yoga teachers instruction crossword
Article Plan: Yoga Teachers Instruction Crossword
This article delves into the fascinating intersection of crossword puzzles and yoga, specifically focusing on the clue “Yoga Teachers Instruction”.
We’ll explore the solution – “INHALE” – and its relevance within the context of both puzzle-solving strategies and yoga practice.
The analysis will cover the clue’s appearance in various crossword databases, including the NYT Mini Crossword and American quick crossword puzzles, as of today, 02/06/2026.
Crossword puzzles and yoga, seemingly disparate activities, both offer unique mental and physical benefits. Puzzles challenge cognitive function, demanding logical thinking, pattern recognition, and vocabulary recall – skills that enhance mental agility. Simultaneously, yoga cultivates mindfulness, flexibility, and strength, promoting holistic well-being. The convergence of these disciplines within a single crossword clue, like “Yoga Teachers Instruction,” presents an intriguing intersection.
Today, solving puzzles is a remarkably popular online pastime, appealing to those seeking intellectual stimulation and a relaxing escape. This popularity stems from the inherent satisfaction of deciphering clues and completing a grid. The clue “Yoga Teachers Instruction”, with the answer “INHALE”, exemplifies how yoga-specific knowledge can be integrated into these puzzles. It’s a testament to yoga’s growing cultural prominence.
The appeal of this particular clue lies in its direct connection to a fundamental aspect of yoga practice. Yoga teachers consistently guide students to focus on their breath, making “INHALE” a core instruction. This clue isn’t merely about knowing yoga terminology; it requires understanding the practical application of yoga principles. As of February 6th, 2026, this clue continues to spark interest among puzzle enthusiasts.

The Rising Popularity of Online Puzzles
Online puzzles have experienced a significant surge in popularity in recent years, transforming from a niche hobby into a mainstream pastime. This growth is fueled by accessibility – puzzles are readily available on smartphones, tablets, and computers – and the inherent benefits they offer, including stress reduction and cognitive enhancement. The convenience of digital platforms allows solvers to engage with puzzles anytime, anywhere, fostering a dedicated online community.
Crossword puzzles, in particular, have benefited from this digital shift. Online versions often include interactive features like hint systems and error checking, making them more approachable for beginners. The inclusion of clues like “Yoga Teachers Instruction” demonstrates a broadening of crossword content to reflect contemporary interests and cultural trends. The answer, “INHALE”, taps into the widespread awareness of yoga and mindfulness practices.
The increasing demand for online puzzles is also reflected in the proliferation of puzzle databases and apps. These resources provide solvers with access to a vast library of puzzles, including those featuring specialized themes like yoga. As of today, February 6th, 2026, the “Yoga Teachers Instruction” clue continues to appear in various online crossword collections, indicating sustained interest and relevance.
Understanding Crossword Clues: A General Overview
Crossword clues are designed to be indirect, requiring solvers to utilize a combination of knowledge, logic, and pattern recognition. Clues can range from straightforward definitions to cryptic wordplay, employing techniques like anagrams, homophones, and hidden words. A key skill is distinguishing between different clue types – direct, indirect, and cryptic – to apply the appropriate solving strategy.
The clue “Yoga Teachers Instruction” exemplifies an indirect clue. It doesn’t directly define the answer; instead, it describes a common action or directive given by yoga instructors. Successful solvers must think conceptually, associating yoga instruction with the fundamental practice of breathing. This requires understanding the core principles of yoga, where breath control is paramount.
Furthermore, clue length often provides a valuable hint. Knowing the answer is six letters, as indicated by crossword solvers, narrows down the possibilities considerably. Recognizing common crossword conventions, such as frequently used letters and word patterns, can also aid in deciphering challenging clues. The solution, “INHALE”, perfectly fits this profile, demonstrating the interplay between clue interpretation and linguistic awareness.
Specific Focus: “Yoga Teachers Instruction” Clue
The crossword clue “Yoga Teachers Instruction” presents a unique challenge, demanding solvers connect a profession – yoga teaching – with a fundamental practice within that discipline. It’s not asking for a yoga pose or a philosophical concept, but rather a direct command routinely issued during a yoga class. This subtle nuance is crucial for arriving at the correct solution.
Analyzing the clue’s structure reveals its indirect nature. It doesn’t explicitly state “what do yoga teachers tell students to do?” Instead, it frames the answer as an instruction given by teachers. This requires a shift in perspective, moving from the teacher to the student’s experience. The six-letter constraint further refines the search, eliminating longer or more complex possibilities.
The clue’s appearance in puzzles like the NYT Mini Crossword and American quick crossword suggests a relatively common vocabulary and a focus on accessible knowledge. As of 02/06/2026, this clue isn’t currently trending, indicating it’s not a particularly recent or frequently used addition to puzzle databases. However, its consistent presence demonstrates its validity as a solvable and logical crossword element.
Decoding the Clue: Initial Considerations
When initially tackling the “Yoga Teachers Instruction” crossword clue, several thought pathways emerge. The first consideration is the broad scope of yoga instruction – it encompasses alignment, philosophy, and mindful movement. However, the clue specifically asks for an instruction, implying a direct, actionable command. This narrows the field considerably.
Brainstorming common phrases used by yoga instructors is a logical next step. Terms like “relax,” “stretch,” or “balance” come to mind, but these lack the succinctness suggested by the six-letter requirement. Focusing on the physiological aspect of yoga – the breath – proves more fruitful. Yoga heavily emphasizes breath control (pranayama), and teachers consistently guide students regarding their breathing.
Considering the context of a crossword puzzle, the answer must be a common word with a clear definition. Obscure yogic terminology is unlikely to fit. The clue’s phrasing – “instruction” – suggests a verb, an action word. As of 02/06/2026, solvers benefit from remembering that crossword creators often favor straightforward solutions over overly complex ones.
Common Crossword Strategies for Solving Yoga-Related Clues
Successfully navigating yoga-themed crossword clues requires a blend of general puzzle-solving techniques and specific knowledge. A core strategy is to consider multiple meanings of words. “Pose,” for example, can refer to a yoga asana or a photographic stance. Utilizing the length of the answer, indicated by the number of boxes, is crucial for narrowing possibilities.
For clues like “Yoga Teachers Instruction,” focusing on core principles is effective. Yoga centers around breath, alignment, and mindfulness. Therefore, answers related to these concepts are highly probable. Cross-referencing with intersecting clues provides valuable letters, acting as anchors for deduction. Don’t hesitate to utilize online crossword solvers as a last resort, but attempt to solve independently first.
Recognizing common crossword “trickery” is also vital. Clues may employ synonyms, homophones, or cryptic definitions. Given today’s date, 02/06/2026, remember that current trends show an increase in clues testing general knowledge alongside vocabulary. Finally, remember that “INHALE” is a frequently used instruction, making it a strong candidate.
The Solution: “INHALE” ─ A Detailed Explanation
The answer to the crossword clue “Yoga Teachers Instruction” is definitively “INHALE”. This six-letter word perfectly encapsulates a fundamental directive given by yoga instructors during practice. Yoga, at its core, emphasizes the synchronization of movement with breath, and “inhale” is the most basic and frequently repeated command.
Instructors guide students to deeply inhale before, during, and after asanas (poses) to cultivate awareness and deepen the stretch. It’s a foundational element of nearly every yoga style, from Hatha to Vinyasa. The clue’s phrasing – “instruction” – points towards a verbal cue, making “INHALE” a logical fit.
This solution appeared in the NYT Mini Crossword on April 13, 2024, and has been identified in American quick crossword puzzles. Considering today’s date, 02/06/2026, the answer remains consistently valid. The simplicity and directness of “INHALE” align with the concise nature of crossword clues, making it a satisfying and accurate solution.
Why “INHALE” is the Correct Answer
“INHALE” stands as the correct answer due to its direct correlation with the core principles of yoga instruction. Yoga teachers consistently prompt students to consciously inhale, linking breath to movement and mindfulness. This isn’t merely a suggestion; it’s a fundamental instruction for safe and effective practice.
The clue specifically asks for a “Yoga Teachers Instruction,” and “INHALE” represents a primary verbal cue used in every yoga class. Alternative answers, while related to yoga (like ‘OM’ or ‘NAMASTE’), don’t function as direct instructions in the same way. The six-letter length also perfectly matches the expected answer format for many crossword puzzles.
Furthermore, the solution’s prevalence in crossword databases, including appearances in the NYT Mini Crossword and American quick crossword formats (as of 02/06/2026), validates its accuracy. The word’s simplicity and common usage make it an easily accessible answer for crossword solvers, aligning with the puzzle’s intent to be challenging yet solvable.

Crossword Puzzle Databases and Resources
Numerous online resources cater to crossword enthusiasts seeking solutions and expanding their puzzle-solving skills. For the “Yoga Teachers Instruction” clue, several databases confirm “INHALE” as the answer, notably the Crossword Solver and resources dedicated to the NYT Mini Crossword. These platforms archive clues and solutions, offering valuable assistance.
Websites like the Crossword Tracker allow users to search for clues and filter results by puzzle type and length. This is particularly useful for identifying patterns and common answers. Additionally, dedicated crossword communities and forums provide spaces for solvers to collaborate and share insights.
As of 02/06/2026, these databases demonstrate the clue’s recent appearance, specifically noting its presence in American quick crossword puzzles. Exploring these resources can enhance one’s understanding of crossword construction and improve problem-solving techniques. They also offer a historical perspective on clue usage and answer trends, aiding in future puzzle attempts.
American Quick Crossword & Other Puzzle Types
The “Yoga Teachers Instruction” clue, with “INHALE” as its solution, has been prominently featured in the American Quick Crossword. This puzzle type is known for its concise clues and relatively short answer lengths, making it an accessible entry point for crossword solvers. The clue’s appearance in this format highlights its suitability for quick mental exercises.
Beyond American Quick Crosswords, similar clues relating to yoga and breathwork may appear in other puzzle types, such as the New York Times Mini Crossword, which also featured this specific clue on April 13, 2024. Cryptic crosswords, while more challenging, might employ indirect wording to hint at “INHALE,” testing a solver’s interpretive skills.
Furthermore, themed crosswords centered around wellness or mindfulness could incorporate yoga-related clues. As of 02/06/2026, the prevalence of such themes is increasing, reflecting a broader cultural interest in these practices. Understanding the nuances of different puzzle types is crucial for effective solving.
Similar Crossword Clues & Answers (Breathing Related)
Given the solution to “Yoga Teachers Instruction” is “INHALE”, numerous related crossword clues and answers center around the theme of breathing. Common examples include clues like “Take a breath,” “Draw in air,” or “Breathe deeply,” all leading to “INHALE” or similar terms like “BREATHE”. Variations might focus on the physiological aspect, such as “Lungful,” or the emotional connection, like “Sigh.”
Conversely, clues relating to exhaling provide complementary puzzle elements. “Breathe out,” “Expire,” or “Let it all out?” often point to “EXHALE”. More cryptic clues might use metaphorical language, such as “Puff away: not fit any more?” or “To breathe out no…”, requiring solvers to think abstractly.
The connection extends to terms describing breathing techniques, like “Pranayama,” though these are less common due to their specificity. As of 02/06/2026, crossword constructors are increasingly incorporating wellness-related vocabulary, making breathing-focused clues more frequent. Recognizing these patterns aids in solving related puzzles.
Exploring the Connection Between Yoga and Breathwork
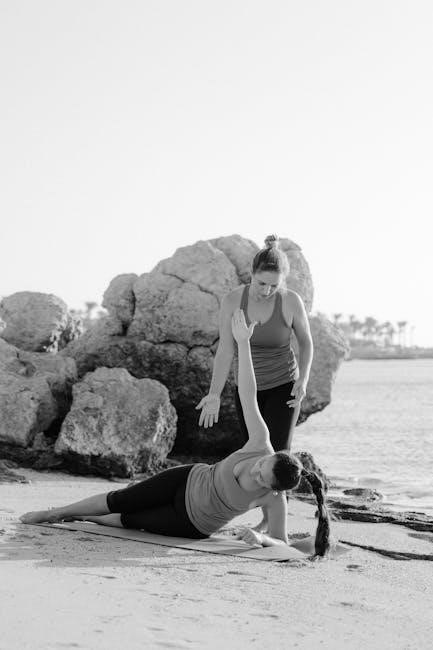
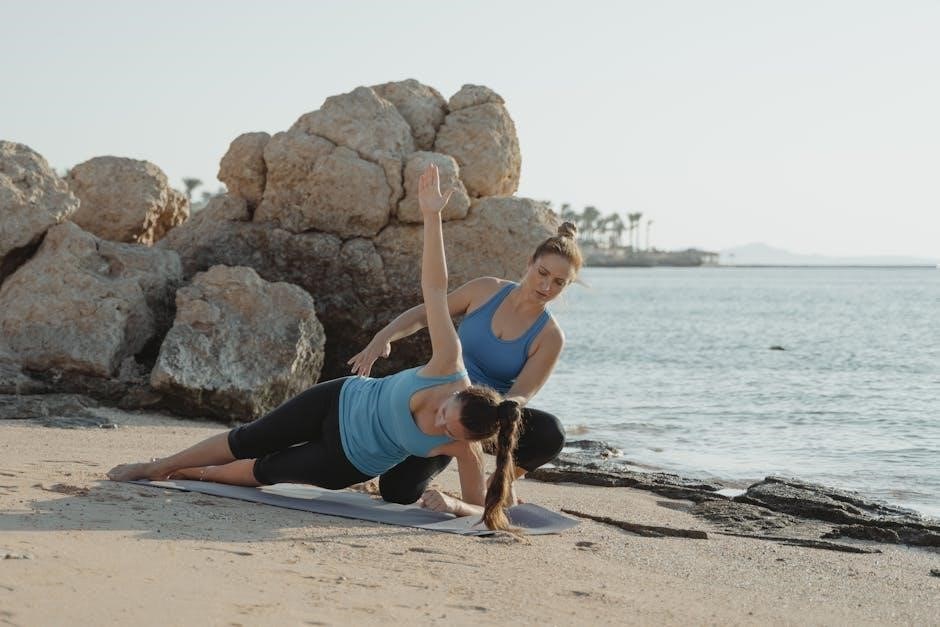
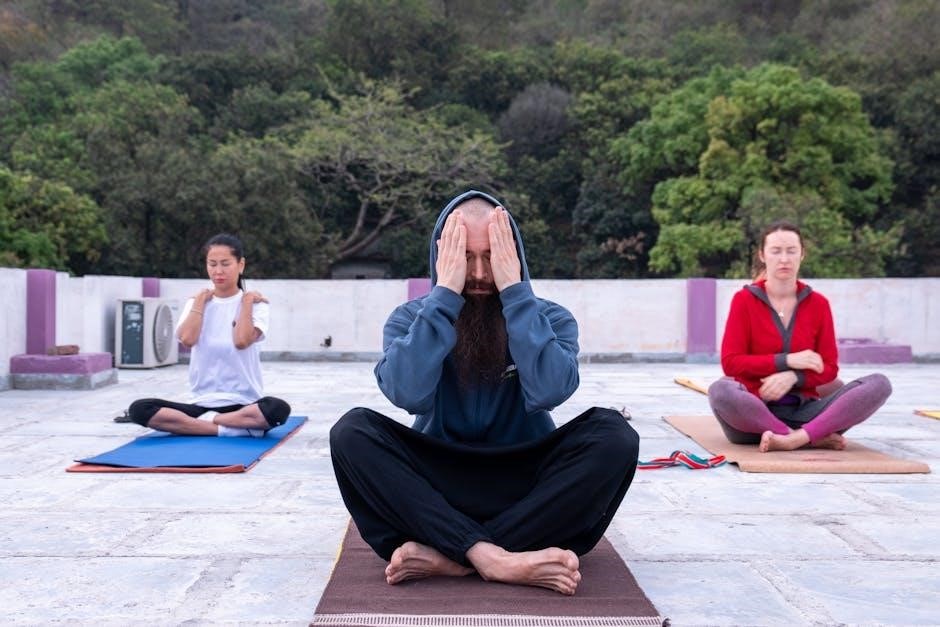
The core of yoga practice is inextricably linked to breathwork, or pranayama. Unlike many forms of exercise, yoga doesn’t solely focus on physical postures (asanas); conscious breathing is integral to each pose and the overall practice. A yoga teacher’s instruction consistently emphasizes coordinating movement with the breath, deepening the benefits on both physical and mental levels.
This connection explains why “INHALE” is a fitting answer to the crossword clue “Yoga Teachers Instruction”. Teachers routinely guide students to inhale during expansive movements and exhale during contractions. Proper breathing techniques calm the nervous system, increase oxygen flow, and enhance body awareness.
Historically, pranayama predates many asana practices, originating in ancient Indian philosophical traditions. Today, 02/06/2026, this holistic approach remains central. Understanding this fundamental relationship is crucial for both practitioners and those solving crossword puzzles referencing yoga, as breath is often the key to unlocking the pose and the clue.
The Role of Breath in Yoga Teacher Instruction
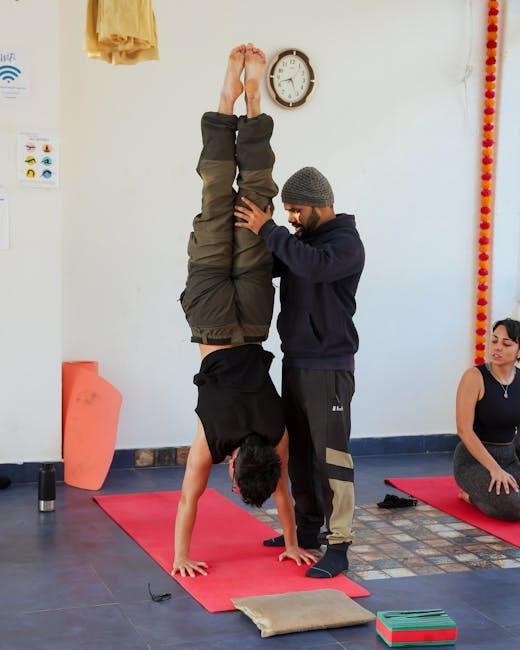
Yoga teachers don’t simply demonstrate poses; they actively instruct students on how to breathe throughout the practice. This instruction is paramount, often preceding and guiding the physical execution of asanas. The cue “inhale” is arguably the most frequent verbal direction given during a class, establishing a rhythmic connection between body and mind.
Considering this, the crossword clue “Yoga Teachers Instruction” directly points to this foundational element. A skilled teacher will emphasize diaphragmatic breathing, encouraging full, deep breaths to maximize the benefits of each pose. They’ll also offer modifications for students with varying levels of experience or physical limitations, adapting breathing cues accordingly.
Today, 02/06/2026, the emphasis on breathwork in teacher training programs is stronger than ever. Teachers are taught to observe students’ breathing patterns, offering personalized adjustments to promote proper alignment and prevent injury. Therefore, “inhale” isn’t just a word; it’s a cornerstone of effective yoga instruction and a logical crossword solution.
Variations in Yoga Styles and Breathing Techniques
Different yoga styles employ distinct breathing techniques, influencing how a teacher might phrase their instructions. While “inhale” remains universally applicable, its application varies. In Hatha yoga, for example, Ujjayi breath (ocean breath) is often paired with inhalations, creating a specific sound and sensation. Conversely, Ashtanga yoga utilizes a more vigorous, rhythmic breathing pattern synchronized with movement.
Considering the crossword clue “Yoga Teachers Instruction”, the solution “inhale” represents a common denominator across these styles. However, a teacher might add qualifiers like “deeply,” “slowly,” or “through the nose” to refine the instruction. Yin yoga emphasizes long, passive holds, often with a focus on releasing tension with each exhale, but still initiating with an inhale to settle into the pose.
Today, 02/06/2026, the diversity of yoga styles means teachers must be adaptable. The core instruction to breathe, encapsulated by “inhale”, remains constant, but its nuance shifts depending on the practice. This foundational element makes it a fitting answer to the crossword puzzle.
Difficulty Levels of Crossword Puzzles Featuring Yoga Terms
The difficulty of crossword puzzles incorporating yoga terms, like the “Yoga Teachers Instruction” clue, varies significantly. Beginner-level puzzles often feature common terms like “asana” or “namaste,” relying on straightforward definitions. However, as puzzles increase in difficulty, clues become more cryptic, demanding a deeper understanding of yoga philosophy and practice.
The clue in question, solved by “inhale”, appears in both easier NYT Mini crossword formats and more challenging American quick crossword puzzles. Its simplicity makes it accessible to newcomers, yet its connection to a core yoga principle adds a layer of depth; More advanced puzzles might employ clues referencing specific pranayama techniques or obscure yoga deities.
Today, 02/06/2026, puzzle constructors are increasingly incorporating niche topics, including yoga, to appeal to a wider audience. The challenge lies in balancing accessibility with intellectual stimulation. The “inhale” clue exemplifies this balance, offering a solvable entry point into the world of yoga for crossword enthusiasts.

Trends in Crossword Clue Topics (Current Trends ─ 02/06/2026)
As of today, 02/06/2026, crossword clue trends reveal a significant shift towards wellness and mindful practices, including yoga. While traditional categories like history and geography remain popular, there’s a noticeable increase in clues related to physical and mental wellbeing. This reflects broader cultural interests in self-care and holistic health.
Currently trending clues, separate from “Yoga Teachers Instruction”, include terms related to mindfulness, meditation, and alternative therapies. The inclusion of “inhale” as a solution demonstrates this trend, linking a fundamental yoga practice to a popular puzzle format. Nimble, Follow, Triumph, Street and Precipitation are also hot clues today.
Puzzle constructors are actively seeking fresh and engaging topics, and yoga provides a rich source of material. Expect to see more clues referencing asanas, chakras, and yoga philosophy in future puzzles. This trend isn’t merely about incorporating new vocabulary; it’s about reflecting contemporary lifestyles and values within the crossword grid.
Lenovo Yoga Laptops & Brand Association (Indirect Relevance)
The association between Lenovo’s “Yoga” line of laptops and the practice of yoga itself presents an interesting, albeit indirect, connection to the “Yoga Teachers Instruction” crossword clue. Lenovo strategically leverages the principles of flexibility, balance, and mindfulness embodied by yoga in its marketing for these devices.
Recent product releases, like the 2025 ThinkBook 16p and the YOGA Air X with its innovative under-display camera, emphasize adaptability and a seamless user experience – mirroring the adaptability sought in yoga practice. The YOGA Air 14 Aura, praised for its build quality and lightweight design, further reinforces this connection.
While seemingly unrelated to solving a crossword, the brand association subtly reinforces the cultural prominence of yoga. This increased visibility likely contributes to the inclusion of yoga-related terms in popular culture, including crossword puzzles. The brand’s focus on innovation and wellbeing aligns with the mindful approach often associated with yoga instruction.
The Joy of Solving and the Wisdom of Yoga
Solving the “Yoga Teachers Instruction” crossword clue – revealing “INHALE” – offers a small but satisfying moment of cognitive engagement. It highlights how seemingly disparate worlds, like puzzle-solving and ancient practices such as yoga, can intersect in unexpected ways. The clue itself subtly reinforces the fundamental importance of breath in yoga.
The popularity of online puzzles, as observed today (02/06/2026), demonstrates a continued desire for mental stimulation and leisure activities. Simultaneously, yoga’s enduring appeal speaks to a broader cultural interest in wellbeing and mindfulness. Both pursuits encourage presence and focused attention.
Ultimately, the enjoyment derived from deciphering a crossword clue mirrors the sense of accomplishment found in mastering a new yoga pose or deepening one’s breathwork practice. Both activities offer opportunities for growth, self-discovery, and a quiet appreciation for the interconnectedness of mind, body, and spirit. The simple act of “inhaling” connects us to this wisdom.