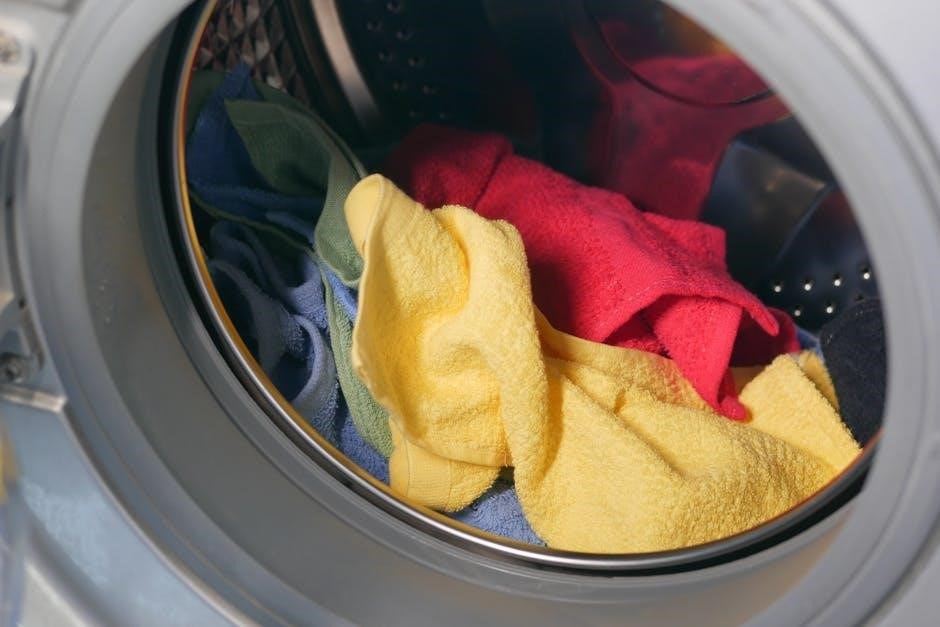
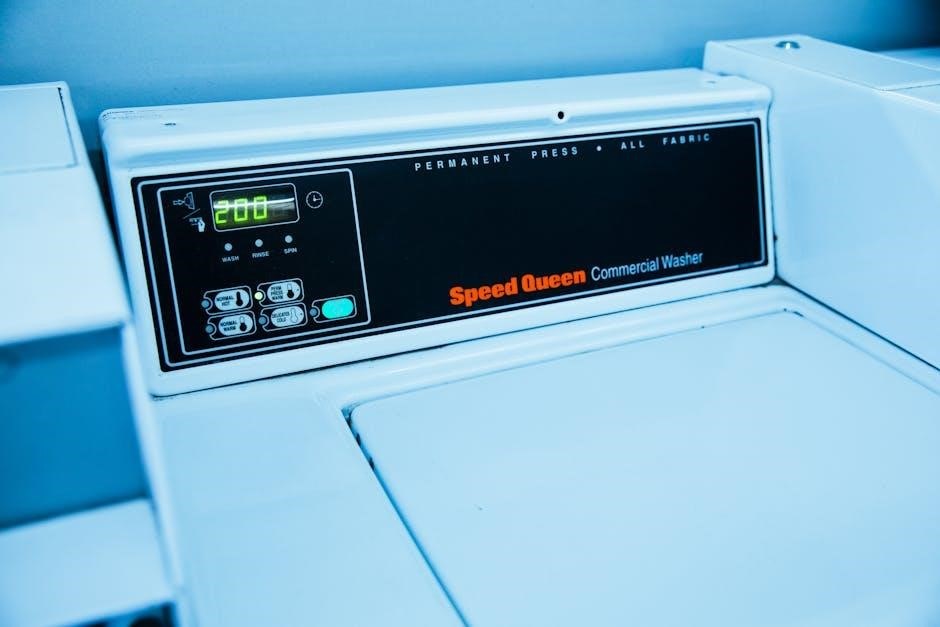
amana washer cycle guide

This guide provides a comprehensive overview of Amana washer cycles, settings, and features․ Understanding these options will help you optimize your laundry routine for effective cleaning and fabric care․ Always consult your washer’s use and care guide․

Understanding Amana Washer Cycles

Amana washers offer a variety of cycles designed to handle different types of fabrics and soil levels․ Each cycle utilizes specific wash actions, water temperatures, and spin speeds to achieve optimal cleaning results while protecting your clothes․ Choosing the right cycle is crucial for extending the life of your garments and ensuring they come out clean and fresh․

This section will explain the purpose of each cycle and how to select the appropriate one for your laundry needs․ Understanding the differences between cycles like Normal, Whites, and others will empower you to customize your wash settings for specific loads․ By carefully considering the fabric type, soil level, and desired level of agitation, you can maximize the performance of your Amana washer and achieve consistently excellent results․

Furthermore, we will delve into how default settings work for each wash cycle and what settings users can change depending on their laundry needs․ It is important to carefully select the cycle, options, and settings for the best fabric care․

Normal Wash Cycle Explained

The Normal wash cycle on your Amana washer is designed for everyday laundry items, such as cottons, linens, and durable synthetic blends․ This cycle provides a balance of cleaning power and fabric care, making it suitable for loads with average soil levels․ Typically, the normal wash cycle defaults to a medium water level, moderate agitation, and a standard spin speed․

When selecting the Normal cycle, you can further customize the wash process by adjusting the water temperature and soil level settings․ For instance, you might choose warm water for lightly soiled items or hot water for heavily soiled clothes․ The soil level setting allows you to adjust the wash time based on the amount of dirt or stains present in your laundry․

Understanding the capabilities of the Normal cycle empowers you to efficiently clean a wide range of everyday laundry items while minimizing wear and tear on your garments․ It is designed for performance, control and convenience․

Whites Wash Cycle Details

The Whites wash cycle on your Amana washer is specifically designed to maximize the cleaning and brightening of white fabrics․ This cycle typically utilizes hotter water temperatures and longer wash times compared to the Normal cycle․ The increased heat helps to lift stains and whiten fabrics, while the extended wash time ensures thorough cleaning․

For best results when using the Whites cycle, it is recommended to use a detergent specifically formulated for white fabrics․ These detergents often contain optical brighteners that enhance the whiteness of your clothes․ It’s also advisable to avoid overloading the washer, as this can hinder the cleaning process․ Allowing ample space for the clothes to move freely ensures that each item receives adequate exposure to the hot water and detergent․

The Whites cycle is ideal for items like white t-shirts, socks, bed linens, and towels․ However, it’s crucial to check the care labels of your garments before using this cycle, as some fabrics may not be suitable for hot water washing․ Always follow the instructions in the use and care guide․

Water Temperature Settings (Cold, Warm, Hot)

Amana washers offer a range of water temperature settings – cold, warm, and hot – to accommodate various fabric types and cleaning needs․ Selecting the appropriate water temperature is crucial for effective stain removal and preventing damage to your clothes․

Cold water is ideal for delicate fabrics, bright colors, and lightly soiled items․ It helps prevent fading, shrinking, and bleeding of dyes․ Cold water washing is also energy-efficient, saving on water heating costs․

Warm water provides a balance between cleaning power and fabric protection․ It’s suitable for moderately soiled clothes and everyday items․ Warm water effectively removes stains while minimizing the risk of damage to sensitive fabrics․

Hot water is best for heavily soiled items, whites, and fabrics that require thorough sanitization․ Hot water effectively removes stubborn stains and kills bacteria․ However, it’s important to note that hot water can cause some fabrics to shrink or fade, so always check the care label before selecting this option․

Choosing the right water temperature is essential for preserving the quality and longevity of your garments․

Fabric Select Knob and Soil Level Settings

The Fabric Select knob on your Amana washer allows you to customize the wash cycle based on the type of fabric you’re washing, ensuring optimal care and cleaning․ This feature, paired with soil level settings, provides a tailored laundry experience․

The Fabric Select knob typically offers options like “Delicates,” “Normal,” “Permanent Press,” and “Heavy Duty․” “Delicates” is designed for delicate fabrics requiring gentle handling․ “Normal” is suitable for everyday items․ “Permanent Press” helps prevent wrinkles in synthetic fabrics․ “Heavy Duty” is for durable, heavily soiled items․

Soil level settings, often indicated as “Light,” “Medium,” and “Heavy,” adjust the wash time and agitation intensity․ Selecting the appropriate soil level ensures effective cleaning without over-washing, which can damage fabrics․

For lightly soiled items, choose “Light” to minimize wash time and energy consumption․ “Medium” is suitable for most loads with average soil․ “Heavy” is reserved for heavily soiled items requiring more intensive cleaning․

By carefully selecting the fabric type and soil level, you can optimize your Amana washer’s performance and extend the life of your clothes․

Deep Water Wash Setting Functionality

The Deep Water Wash setting on your Amana washer provides an increased water level during the wash cycle, ensuring thorough saturation and cleaning of heavily soiled loads․ This feature is particularly useful when washing bulky items or loads with stubborn stains․

When selected, the Deep Water Wash setting overrides the auto-sensing water level feature, filling the wash tub with more water than a standard cycle․ This increased water volume allows for better movement of clothes, improved detergent distribution, and more effective soil removal․

To use the Deep Water Wash setting, simply select your desired wash cycle (e․g․, Normal, Heavy Duty) and then activate the Deep Water Wash option․ The washer will then fill to a higher water level than it normally would for that cycle․

It’s important to note that using the Deep Water Wash setting will increase water consumption․ Therefore, it’s best to reserve this feature for loads that truly require the extra water for optimal cleaning․

Consider using the Deep Water Wash setting for items like bedding, towels, work clothes, or any load with significant dirt or grime․

Auto Sensing Water Level Feature

The Auto Sensing Water Level feature in Amana washers is designed to optimize water usage by automatically adjusting the water level based on the size of the load․ This helps to conserve water and energy while still providing effective cleaning․

When the Auto Sensing Water Level is selected, the washer will initially fill with a small amount of water․ The machine will then detect the size and absorbency of the load, adding more water as needed until the clothes are properly saturated and can move freely during the wash cycle․ The water level should ensure the load engages the agitator․

This feature eliminates the guesswork of manually selecting the water level, ensuring that you’re not using more water than necessary․ It is particularly useful for mixed loads or when you’re unsure of the ideal water level for a particular type of fabric․

To use the Auto Sensing Water Level feature, simply select the “Auto Sensing” option on the water level knob․ The washer will then automatically determine the appropriate water level for your load․

For optimal performance with the Auto Sensing feature, avoid overloading the washer․ Overloading can prevent the machine from accurately sensing the load size, potentially leading to insufficient water levels․

Extra Rinse Option

The Extra Rinse option on your Amana washer provides an additional rinse cycle at the end of the wash, ensuring a more thorough removal of detergent residue and soils from your clothes․ This is especially beneficial for individuals with sensitive skin or allergies, as it minimizes potential irritation caused by lingering detergent․

Activating the Extra Rinse feature is simple․ Look for the “Extra Rinse” button or setting on your washer’s control panel and select it before starting the wash cycle․ The washer will automatically add an extra rinse phase after the main wash and initial rinse are complete․

The Extra Rinse option is also recommended for heavily soiled items or when using a large amount of detergent․ It can help to remove stubborn stains and prevent detergent buildup, leading to cleaner, fresher-smelling clothes․

While the Extra Rinse option provides a more thorough cleaning, it’s essential to consider the impact on water and energy consumption․ Adding an extra rinse will naturally increase the amount of water used per load․ Therefore, it’s advisable to use this feature only when necessary․

Consider using the Extra Rinse option for baby clothes, delicate fabrics, or items that come into direct contact with sensitive skin․ Doing so can help to ensure that these items are thoroughly rinsed and free from potential irritants․

Extra Spin Option

The Extra Spin option on your Amana washer provides an extended spin cycle at the end of the wash, maximizing water extraction from your clothes․ This feature significantly reduces drying time, saving you energy and time, especially when dealing with bulky items or heavy fabrics․

To activate the Extra Spin function, locate the corresponding button or setting on your washer’s control panel․ Selecting it before initiating the wash cycle will instruct the washer to perform an additional, more intense spin after the standard spin cycle concludes․

The benefits of using the Extra Spin option are multifold․ Firstly, it shortens the duration required for drying clothes, whether you’re using a machine dryer or air-drying them․ This reduction in drying time translates to energy savings and lower utility bills․

Furthermore, the Extra Spin option is particularly useful for items like towels, jeans, and bedding, which tend to retain more water․ By removing excess moisture, it prevents musty odors and promotes faster, more efficient drying․

However, it’s important to exercise caution when using the Extra Spin option for delicate fabrics․ The increased spin speed can potentially cause damage or distortion to sensitive materials․ Always refer to the care labels on your garments and adjust the spin settings accordingly․

Troubleshooting Long Cycle Times

If your Amana washer is experiencing unusually long cycle times, several factors could be contributing to the issue․ Addressing these potential problems can help restore your washer to its optimal performance․ One common cause is low water pressure․ Ensure that both the hot and cold water supply valves are fully open and that the hoses are not kinked or blocked․

Another possible culprit is an overloaded machine․ Overfilling the washer can prevent it from agitating and spinning properly, leading to extended cycle times․ Try reducing the load size to see if it resolves the problem․ The soil level setting can also impact cycle duration․ Selecting a higher soil level will automatically extend the wash time to ensure thorough cleaning․

Furthermore, check the drain hose for any clogs or obstructions․ A blocked drain hose can hinder the washer’s ability to remove water efficiently, resulting in prolonged cycles․ Inspect the hose and remove any debris that may be present․

In some cases, a faulty water level sensor or timer can cause the washer to miscalculate the cycle time․ If you suspect a component malfunction, it’s best to consult a qualified appliance repair technician for diagnosis and repair․

Remember to consult your washer’s user manual for specific troubleshooting steps and recommendations․

eatsmart scale manual

EatSmart scales are designed to provide accurate weight measurements‚ often incorporating advanced features. The user manual is your guide to maximizing your scale’s potential‚ ensuring correct setup‚ operation‚ and troubleshooting for long-term use. It’s essential reading!

Overview of EatSmart Products

EatSmart offers a range of bathroom scales‚ including basic digital models and advanced scales with body composition analysis. Their products aim to provide accurate weight measurements and additional health metrics. Select models even incorporate Bluetooth connectivity‚ allowing users to track their progress via a dedicated app; EatSmart scales are known for their user-friendly interfaces and reliable performance. The EatSmart product line includes the GetFit scale which measures weight‚ body fat‚ body water‚ muscle mass‚ and bone mass. Product manuals exist for the Precision Digital Bathroom Scale‚ Precision Premium Digital Bathroom Scale‚ and Precision Ultra-Wide Bathroom Scale‚ and ESBS models; Each scale is designed with easy-to-use interfaces.

Importance of the User Manual

The EatSmart scale’s user manual is crucial for understanding its features and ensuring accurate readings. It provides detailed instructions on initial setup‚ including battery installation and selecting measurement units. The manual also explains how to properly use the scale for basic weighing and interpret display readings. For advanced models with body composition analysis‚ the manual guides users through setting up user profiles and understanding the data. It is a tool for troubleshooting common issues and finding customer support contact information. Consulting the manual maximizes the scale’s lifespan and ensures accurate results. It contains product-specific information and warranty details.

Initial Setup and Operation

Proper initial setup is critical for accurate measurements; This section covers unboxing‚ battery installation‚ selecting units (lbs/kg)‚ and optimal placement for reliable readings from your EatSmart scale.

Package Contents

Your EatSmart scale package typically includes the digital bathroom scale itself‚ an instruction manual for guidance‚ and batteries to power the device. Some models may include additional items‚ such as a body fat measurement guide or a measuring tape. Refer to the specific model’s manual for a comprehensive list of included components. Before using the scale‚ carefully unpack all items and verify that everything listed in the manual is present and undamaged. Contact EatSmart customer support if anything is missing or appears to be defective. Keep the packaging in case you need to return the scale.

Battery Installation and Replacement

To install or replace the batteries in your EatSmart scale‚ locate the battery compartment on the underside of the unit. Open the compartment cover‚ usually by sliding or using a small screwdriver. Insert the correct type of batteries (typically AAA) according to the polarity markings inside the compartment. Ensure the batteries are properly aligned for the scale to function correctly. When the display shows “LO‚” it indicates that the batteries need replacing. Replace all batteries simultaneously with fresh ones for optimal performance. Properly dispose of old batteries according to local regulations. Refer to your scale’s manual for specific battery requirements and instructions.

Selecting Measurement Units (lbs/kg)

EatSmart scales allow you to choose between pounds (lbs) and kilograms (kg) for your weight measurements. To select your preferred unit‚ locate the unit switch on the underside of the scale. This switch is usually a small slider or button labeled “lbs/kg”. Slide or press the switch to your desired unit. The scale will remember your selection for future use. If you cannot find the switch‚ consult your user manual for specific instructions. Ensure the correct unit is selected before weighing yourself to obtain accurate readings. This setting affects only the displayed weight‚ not the scale’s accuracy.

Placement and Surface Considerations

For accurate and consistent weight measurements‚ the placement of your EatSmart scale is critical. Always place the scale on a hard‚ flat‚ and level surface. Avoid carpets‚ rugs‚ or uneven flooring‚ as these can interfere with the scale’s sensors and result in inaccurate readings. Ensure the scale is not placed near walls or other obstructions that could prevent it from resting flat. A tile or hardwood floor is generally ideal. Before each use‚ double-check that the scale is stable and not rocking. Following these placement guidelines will help ensure you receive reliable weight data from your EatSmart scale.

Using EatSmart Scales

Using your EatSmart scale is straightforward. This section provides clear instructions on basic weighing procedures and how to interpret the information displayed on the scale’s screen for effective monitoring.

Basic Weighing Instructions

To use your EatSmart scale for basic weighing‚ first‚ ensure it is placed on a hard‚ flat surface. This is crucial for accurate readings. Then‚ if necessary‚ initialize the scale by briefly pressing on the platform. Wait for the display to show “0.0” before stepping onto the scale with bare feet‚ ensuring even weight distribution. Stand still until the weight reading stabilizes and is displayed. The scale will automatically turn off after approximately 10 seconds. Remember to select your desired measurement unit (lbs/kg) before weighing. Avoid moving or bumping the scale during measurement for the best results. Repeat for consistent measurements.

Understanding the Display

The EatSmart scale display provides vital information regarding your weight and the scale’s status. The primary function is to show your weight in either pounds (lbs) or kilograms (kg)‚ depending on your selected unit. A stable reading indicates the final measurement. The display may also show error messages‚ such as “LO‚” which signals low battery and the need for replacement. Some models might display additional information like body fat percentage or user profile numbers. Familiarize yourself with the symbols and indicators in your scale’s manual to accurately interpret the displayed information and ensure optimal use. Understanding the display prevents misinterpretations.

Advanced Features (if applicable)

Some EatSmart scales offer advanced features like body composition analysis‚ measuring body fat‚ water‚ and muscle mass. Setting up user profiles allows personalized tracking. Refer to your manual for feature instructions.

Body Composition Analysis (Fat‚ Water‚ Muscle‚ Bone Mass)

Certain EatSmart scales go beyond basic weight measurement‚ offering Body Composition Analysis. This feature estimates body fat percentage‚ total body water‚ muscle mass‚ and bone mass. These scales use Bioelectrical Impedance Analysis (BIA) technology. Remember that factors like hydration levels and exercise can influence the accuracy of BIA measurements.
For best results‚ use the scale under consistent conditions. Refer to your EatSmart scale’s manual for details on how to interpret the readings and what they mean for your overall health. These analyses are for informational purposes only and should not replace professional medical advice from your healthcare provider.

Setting Up User Profiles

Many advanced EatSmart scales allow you to set up user profiles for multiple individuals. This feature is essential for accurately tracking body composition data over time. Each user profile stores personal information such as age‚ gender‚ and height‚ which are used in the body composition analysis calculations. Follow the instructions in your EatSmart scale’s user manual to create and manage user profiles.

Setting up profiles ensures that each person receives personalized readings. Typically‚ you’ll navigate through the scale’s menu using buttons or a touchscreen to enter the required details. After setting up‚ the scale can automatically recognize users based on their stored data for convenient tracking.

Troubleshooting

Encountering issues with your EatSmart scale? This section provides guidance on resolving common problems. Consult your user manual for detailed troubleshooting steps and solutions to error messages‚ ensuring accurate and reliable performance.

Common Error Messages (e.g.‚ “LO”)

EatSmart scales‚ like any electronic device‚ may occasionally display error messages. One common error is “LO‚” which typically indicates low battery power. When you see this message‚ it’s time to replace the batteries in your scale. The included batteries are often trial batteries and might have a shorter lifespan than standard replacements.

Always refer to your EatSmart scale’s instruction manual for a comprehensive list of error messages and their corresponding solutions. The manual provides specific troubleshooting steps to help you quickly identify and resolve any issues you might encounter. If the error persists after troubleshooting‚ consider contacting EatSmart customer support.

Calibration Issues

Calibration is crucial for ensuring accurate weight readings on your EatSmart scale. If you suspect your scale isn’t calibrated correctly‚ consult the instruction manual for specific calibration instructions. EatSmart scales often use “Step-On” technology but may still require initial auto-calibration.

Ensure the scale is placed on a hard‚ flat surface for optimal accuracy. Avoid carpets or uneven flooring. Some users have reported inconsistencies‚ so carefully follow the calibration steps outlined in the manual. If problems persist‚ try replacing the batteries‚ as low battery power can sometimes affect calibration. Contact EatSmart support if you continue to experience calibration issues after troubleshooting.

Customer Support and Warranty

EatSmart provides customer support via email and phone. Their scales typically come with a two-year warranty covering defects. Refer to your manual for detailed contact and warranty information.

Contact Information for EatSmart Support

For any inquiries or assistance related to EatSmart products that are not addressed in the user manual‚ EatSmart offers several avenues for support. You can reach their customer service team by sending an email to eatsmartlifetimebrands.com. Alternatively‚ you can contact them by phone at (866) 843-3905. Be sure to have your scale’s model number and purchase information readily available when contacting support. This will help them assist you more efficiently. EatSmart is committed to providing excellent customer service and resolving any issues you may encounter with their products. They want to ensure a positive experience with their scales.

Warranty Information

EatSmart provides a warranty that covers defects in material and workmanship under normal use for a defined period. This warranty generally extends for two (2) years from the date of purchase‚ excluding batteries. To make a warranty claim‚ you may need to provide proof of purchase and a description of the issue. The warranty may not cover damage caused by misuse‚ accidents‚ or unauthorized repairs. It’s crucial to consult your EatSmart scale’s manual for the specific terms and conditions of the warranty. Understanding the warranty can protect you from unexpected costs associated with repairs or replacements during the coverage period.

nikon f manual

Nikon F Manual: A Comprehensive Guide

Welcome to the comprehensive guide for the Nikon F, a legendary 35mm SLR camera that revolutionized the photography world․ This manual provides detailed instructions, helpful tips, and troubleshooting advice to master your Nikon F and capture stunning images․

The Nikon F, introduced in 1959 by Nikon Corporation, stands as a landmark achievement in camera design․ As one of Nikon’s first 35mm single-lens reflex cameras, it set a new standard for professional photography․ Its robust build quality, versatile features, and innovative design made it a favorite among photographers worldwide․ The Nikon F boasts a removable lens mount, a wide range of shutter speeds, and a durable body, designed to withstand the rigors of professional use․ This guide explores the Nikon F’s rich history, key features, operation, and maintenance, ensuring you get the best out of this iconic camera․

History and Significance

Explore the rich history and lasting significance of the Nikon F, a groundbreaking camera that shaped the landscape of photography․ Discover its impact on SLR technology and its enduring legacy among photographers․

The Nikon F’s Debut in 1959

In 1959, Nikon introduced the F, its first SLR camera, marking a pivotal moment in photographic history․ This camera quickly gained recognition for its robust design, exceptional image quality, and innovative features․ The Nikon F offered photographers a versatile and reliable tool, equipped with interchangeable lenses and a precise metering system․ Its wide viewing angle, achieved through its prism system, enabled accurate framing and focusing, making it a favorite among professionals and enthusiasts․ The Nikon F’s debut revolutionized the SLR market, setting a new standard for quality and performance․

Impact on the SLR Camera Market

The Nikon F’s arrival in 1959 had a profound impact on the SLR camera market․ Its innovative design and exceptional performance set a new benchmark for professional photography equipment․ The Nikon F’s robust build quality and versatile features, including interchangeable lenses and reliable metering, quickly gained favor among photographers․ Its popularity spurred other manufacturers to innovate and improve their own SLR offerings, leading to significant advancements in camera technology․ The Nikon F’s legacy continues to influence camera design and functionality to this day, solidifying its status as a groundbreaking model in the history of photography․

Key Features and Specifications

Explore the key features and specifications of the Nikon F, including its lens mount, shutter speed range, and metering system․ Understand the technical aspects that made this camera a revolutionary tool for photographers․

Lens Mount and Compatibility

The Nikon F features the iconic Nikon F mount, enabling compatibility with a vast range of lenses․ This bayonet mount allows for secure and quick lens changes, providing photographers with flexibility․ The F mount’s enduring legacy has made it a standard, and many lenses, both vintage and modern, are adaptable․ Understanding lens compatibility ensures you maximize the Nikon F’s potential․

While primarily designed for manual focus lenses, adapters can enable the use of newer lenses․ Consider the lens type (D or G) for full functionality․

Shutter Speed and Metering System

The Nikon F offers a versatile range of shutter speeds, typically from 1 second to 1/1000th of a second, plus bulb mode for extended exposures․ Understanding the shutter speed dial’s operation is essential for controlling motion blur and depth of field․

The Nikon F initially lacked a built-in metering system, requiring external light meters or the “Sunny 16” rule․ Later models, such as the FTn, introduced through-the-lens (TTL) metering for more accurate exposure readings․ Familiarize yourself with your specific model’s metering capabilities for optimal results․

Operating the Nikon F

Operating the Nikon F involves understanding its mechanical controls․ From loading film to setting the correct exposure, this section guides you through the essential steps for capturing memorable photographs with this iconic camera․

Loading and Unloading Film

To load film, first ensure the camera is off․ Open the film back using the latch and align the film cartridge with the chamber slot․ Extend the film leader to the take-up spool and secure it․ Advance the film using the lever until properly engaged, and close the back․

For unloading, switch off the camera, find the rewind knob, flip the crank, and turn clockwise until resistance ceases․ Open the film back carefully remove the rewound film for processing․ Always handle film in subdued light to prevent accidental exposure․

Setting Shutter Speed and Aperture

To set the shutter speed on your Nikon F, locate the dial on the top plate․ Rotate it to align with your desired shutter speed․ Remember to consider your film speed and lighting conditions for proper exposure․

Adjusting the aperture involves rotating the aperture ring on the lens itself․ Pay attention to the aperture scale to select the appropriate f-number․ Use a wider aperture (smaller f-number) for shallow depth of field and low-light situations, and a narrower aperture (larger f-number) for greater depth of field and brighter conditions․

Troubleshooting Common Issues

This section addresses frequently encountered problems with the Nikon F․ We offer practical solutions for resolving these issues․ By following these tips, you can maintain your camera and ensure it continues to perform optimally․

Focusing Problems

Experiencing difficulty achieving sharp focus with your Nikon F? First, adjust the diopter control near the viewfinder for optimal clarity․ Ensure the lens is securely and correctly mounted to the camera body․ A loose connection can cause focusing inaccuracies․ Next, inspect the focusing screen within the viewfinder for any dirt, smudges, or obstructions․ Gently clean the screen with a microfiber cloth if necessary․

If the problem persists, consider that the lens itself may have internal issues, such as element separation or damage․ Try using a different lens to rule out lens-related problems․ In some cases, the mirror may be misaligned․

Film Rewinding Issues

Encountering trouble rewinding your film in the Nikon F? Ensure the camera is switched off before attempting to rewind․ Locate the rewind knob on the camera’s top left side․ Gently flip up the crank on the rewind knob and turn it clockwise․ You should feel slight resistance initially․ Continue turning until the resistance suddenly decreases, indicating the film has fully disengaged from the take-up spool․

Avoid forcing the rewind mechanism, as this can tear the film․ If you encounter excessive resistance, double-check that the film advance lever is fully engaged․ If issues continue, a repair may be needed․

Accessories and Add-ons

Explore a range of accessories and add-ons available for the Nikon F․ These enhancements can significantly expand the camera’s capabilities, offering greater versatility and creative control for various photographic endeavors․

Available Lenses and Finders

The Nikon F’s versatility is greatly enhanced by its compatibility with a wide array of lenses and finders․ The Nikon F mount allows for interchangeable lenses, providing photographers with various focal lengths to choose from․ From wide-angle lenses ideal for landscapes to telephoto lenses perfect for distant subjects, the Nikon F offers a lens for every situation․ Different finders, such as the standard prism finder, waist-level finder, and action finder, also offer photographers different viewing options and shooting styles․ These options provide accurate framing and focusing and cater to diverse photographic needs․

Nikon F Resources

Explore a wealth of resources for your Nikon F, including online manuals, documentation, repair information, and vibrant communities․ These resources are designed to help you maintain, troubleshoot, and fully enjoy your classic camera․

Online Manuals and Documentation

Access a wealth of online resources for your Nikon F, including digital versions of the original instruction manuals and brochures․ These documents provide comprehensive details on the camera’s features, operation, and maintenance․ Explore websites dedicated to classic Nikon cameras, which often host scanned manuals and user guides․

Additionally, online forums and communities may offer shared knowledge and troubleshooting tips․ Nikon’s official website may have downloadable resources, even for legacy products․ Be sure to check independent camera repair sites for supplementary information․ These online resources are invaluable for both new users and seasoned enthusiasts seeking to deepen their understanding of the Nikon F․

Repair and Maintenance Information

Maintaining your Nikon F ensures its longevity and optimal performance․ Seek out specialized repair shops experienced with classic cameras for professional servicing․ Online forums and communities often provide DIY repair guides and advice from fellow enthusiasts․ Regular cleaning of the lens, mirror, and film chamber is crucial․

Proper storage in a cool, dry place prevents damage․ Be mindful of the camera’s age and avoid forcing any mechanisms․ Replacement parts can be sourced from online retailers or vintage camera suppliers․ Remember that careful handling and proactive maintenance will keep your Nikon F in excellent working condition for years to come․

old town guide 147 canoe

Old Town Canoe Company: A Comprehensive Guide

Old Town Canoe Company, a historic maker in Maine, began in 1898. Known for wood-canvas canoes, they evolved to polyethylene models. Their canoes, like the Guide 147, blend tradition with modern comfort, enduring as a top manufacturer with a rich heritage and sturdy, well-built designs.

History and Origins

The Old Town Canoe Company’s journey began in 1898 in Old Town, Maine, initially producing wood-canvas canoes. This location was ideal, situated near the Penobscot River and the Penobscot Indian Island Reservation, drawing on the area’s rich history of birch bark canoe construction. A.E. Wickett built the first wooden canoe behind Gray Hardware, marking the start of their legacy.

The company officially formed as the Indian Old Town Canoe Company in 1900, later transitioning to the Robertson Old Town Canoe Company briefly, before settling on the name Old Town Canoe Company. From its humble beginnings, Old Town has grown to become the largest canoe manufacturer, recognized globally for its quality and heritage. Their initial designs were heavily influenced by the canoes of the Penobscot people, and they were known for their craftsmanship and durability.

The company quickly gained a reputation for producing high-quality canoes that were well-suited for the rugged conditions of the Maine wilderness. Early on, they specialized in canvas-covered wooden canoes, a method that combined the strength of wood with the waterproof properties of canvas. This innovative approach allowed them to create canoes that were both lightweight and durable, making them popular among hunters, fishermen, and recreational paddlers alike;

Early Years as Indian Old Town Canoe Company

The Old Town Canoe Company officially emerged as the Indian Old Town Canoe Company in 1900, marking a pivotal moment in its history. This initial name reflected the company’s geographical roots in Old Town, Maine, and acknowledged the significant influence of the Penobscot Native Americans, whose expertise in canoe building had long been established in the region. The Penobscot people had been crafting birch bark canoes for centuries, and their designs and techniques heavily influenced the early production methods of the company.

During these formative years, the company focused on producing wood-and-canvas canoes, utilizing local materials such as cedar planking, spruce gunwales, and ash for decks, seat frames, and thwarts. The canoes were marketed under the Old Town brand, gaining popularity for their quality and durability. The Indian Old Town Canoe Company quickly established itself as a prominent canoe manufacturer, catering to a growing demand for reliable watercraft.

These early canoes were essential for transportation, fishing, and hunting in the Maine wilderness. The company’s commitment to quality and craftsmanship helped it to build a strong reputation, attracting customers from both local communities and beyond. This period laid the foundation for the company’s future growth and success, setting the stage for its evolution into the iconic Old Town Canoe Company.

Transition to Robertson Old Town Canoe Company

Following its initial establishment as the Indian Old Town Canoe Company, a brief but significant transition occurred with the partnership of J.R. Robertson. This led to a temporary renaming of the business to the Robertson Old Town Canoe Company. While the exact details and duration of this partnership remain somewhat limited in historical records, its impact on the company’s trajectory is noteworthy. The involvement of J.R. Robertson likely brought new perspectives and potentially influenced business strategies during this period.

Despite the name change, the core focus of the company remained the same: producing high-quality wood-and-canvas canoes. The craftsmanship and attention to detail that characterized the Indian Old Town Canoe Company continued under the Robertson Old Town Canoe Company. This ensured that the canoes maintained their reputation for durability and reliability, appealing to both recreational users and those who depended on them for transportation and work.

The transition to the Robertson Old Town Canoe Company was a stepping stone in the company’s evolution. It marked a period of change and adaptation as the business navigated new partnerships and sought to solidify its position in the growing canoe market. This phase, though relatively short, played a role in shaping the future direction of the company, ultimately leading to its incorporation and further expansion. The legacy of quality and innovation established during this time would continue to define the Old Town Canoe Company for decades to come.

Incorporation and Growth

The Old Town Canoe Company officially incorporated in 1901, marking a pivotal moment in its history. This transition from a partnership to a formal corporation provided a more structured framework for business operations and facilitated significant growth. With incorporation, the company gained the ability to raise capital more easily, enabling investments in expanded manufacturing facilities and improved production processes. This strategic move allowed Old Town to meet the increasing demand for its canoes, which were gaining popularity across the United States and beyond.

The company’s growth was fueled by several factors, including its reputation for producing durable and reliable canoes, its effective marketing strategies, and its ability to adapt to changing market conditions. Old Town capitalized on the growing interest in outdoor recreation and the increasing accessibility of waterways, positioning its canoes as essential equipment for exploration, fishing, and leisure activities. As demand continued to rise, the company expanded its product line to include a wider range of canoe models, catering to diverse customer needs and preferences.

Furthermore, Old Town’s commitment to innovation played a crucial role in its growth. The company continuously sought to improve its manufacturing techniques and materials, ensuring that its canoes remained at the forefront of quality and performance. This dedication to excellence helped Old Town establish itself as a leading canoe manufacturer, solidifying its position in the market and paving the way for continued success in the years to come. The early 20th century marked a period of significant expansion and prosperity for the Old Town Canoe Company, setting the stage for its long-lasting legacy in the canoe industry.

Manufacturing Evolution

The Old Town Canoe Company’s manufacturing processes have undergone significant evolution since its inception in the late 19th century. Initially, the company focused on traditional wood-and-canvas construction, utilizing locally sourced materials and time-honored techniques passed down through generations of skilled craftsmen. These early canoes were meticulously handcrafted, with each step requiring precision and expertise.

As demand for canoes grew, Old Town sought ways to streamline its production processes while maintaining its commitment to quality. The introduction of machinery and more efficient assembly line methods allowed the company to increase its output without sacrificing the durability and performance of its canoes. However, the transition to new manufacturing techniques was gradual, as Old Town recognized the importance of preserving the craftsmanship and attention to detail that had become synonymous with its brand.

In more recent years, Old Town has embraced new materials and technologies, such as polyethylene, to further enhance the durability and affordability of its canoes. While wood-and-canvas canoes remain a part of Old Town’s product line, the shift towards polyethylene has enabled the company to cater to a broader range of customers, including those seeking low-maintenance and impact-resistant watercraft. This evolution in manufacturing reflects Old Town’s ongoing commitment to innovation and its ability to adapt to changing market demands while staying true to its core values.

Wood-Canvas Construction

The wood-canvas construction method, a hallmark of early Old Town canoes, represents a blend of traditional craftsmanship and innovative design; This technique involves stretching a durable canvas skin over a meticulously crafted wooden frame, resulting in a watercraft that is both lightweight and resilient. The wooden frame, typically constructed from cedar or spruce, provides structural integrity and defines the canoe’s shape, while the canvas covering creates a watertight barrier and protects the wood from the elements.

The process of constructing a wood-canvas canoe begins with the selection of high-quality lumber, which is then carefully shaped and assembled to form the canoe’s ribs, planking, and gunwales. Once the wooden frame is complete, the canvas is stretched tightly over it and secured with tacks or staples. Multiple coats of filler and paint are then applied to the canvas, creating a smooth, durable surface that is resistant to water and abrasion.

Wood-canvas canoes are prized for their aesthetic appeal, smooth ride, and ease of repair. However, they also require regular maintenance to prevent rot and decay, and they are more susceptible to damage from impacts than canoes made from more modern materials. Despite these drawbacks, many canoe enthusiasts continue to appreciate the classic beauty and craftsmanship of wood-canvas canoes, and they remain a popular choice for recreational paddling and wilderness exploration.

Shift to Polyethylene

Recognizing the evolving needs of modern paddlers, Old Town Canoe Company transitioned from traditional wood-canvas construction to polyethylene in response to market demands for increased durability and reduced maintenance. This shift marked a significant turning point in the company’s history, enabling them to produce canoes that are more resistant to impacts, abrasion, and the effects of prolonged exposure to the elements. Polyethylene canoes, like the Guide 147, offer exceptional value for recreational paddlers seeking a reliable and long-lasting watercraft.

The decision to embrace polyethylene was driven by several factors, including the material’s inherent strength, affordability, and ease of manufacturing. Polyethylene canoes are molded as a single piece, eliminating the need for complex assembly and reducing the risk of leaks or structural failures. This construction method also allows for greater design flexibility, enabling Old Town to create canoes with enhanced stability, tracking, and overall performance.

While polyethylene canoes may lack the classic aesthetic appeal of their wood-canvas counterparts, they offer significant advantages in terms of durability and ease of maintenance. They are ideal for paddlers who frequently encounter rocks, submerged obstacles, or rough water conditions, and they require minimal upkeep, making them a practical choice for recreational use.

Legacy and Impact

Old Town Canoe Company’s legacy extends far beyond its manufacturing prowess; it represents a significant chapter in American recreational history. For over a century, Old Town has shaped how people experience the waterways, providing reliable and accessible canoes that have fostered a love for paddling and the outdoors. The impact of their canoes, especially models like the Guide 147, is evident in countless family memories created on lakes, rivers, and streams across the nation.

The company’s commitment to quality craftsmanship and innovative design has solidified its position as a leader in the canoe industry. Old Town’s canoes have not only provided a means of transportation and recreation but also served as a symbol of American ingenuity and outdoor spirit. Their designs have influenced subsequent generations of canoe builders, and their brand name has become synonymous with quality and reliability.

Moreover, Old Town’s presence in Old Town, Maine, has had a significant economic and cultural impact on the local community. The company has provided employment opportunities and contributed to the town’s identity as a center for canoe manufacturing. Old Town Canoe Company’s legacy is not merely about building canoes; it’s about fostering a connection with nature, preserving a tradition of craftsmanship, and enriching the lives of countless individuals and communities.

Influence of Penobscot Canoes

The Old Town Canoe Company’s designs, including the popular Guide 147, owe a significant debt to the traditional watercraft of the Penobscot people. Living alongside the Penobscot River, the company’s founders were deeply influenced by the birch bark canoes crafted by the Penobscot Nation for centuries. These canoes were perfectly adapted to the region’s waterways, inspiring the early designs of Old Town’s wood-and-canvas canoes.

The Penobscot canoes embodied a deep understanding of hydrodynamics, material science, and craftsmanship. Their light weight, maneuverability, and stability made them ideal for navigating the rivers and lakes of Maine. Old Town’s designers recognized the inherent value of these designs and sought to replicate their key features in their own canoes.

The influence of Penobscot canoes is evident in the sleek lines, efficient hull shapes, and overall functionality of Old Town’s canoes. While Old Town adopted wood-and-canvas construction techniques, the underlying principles of design remained rooted in the Penobscot tradition. This connection to indigenous knowledge and craftsmanship has contributed to the enduring success and cultural significance of Old Town Canoe Company, ensuring that the spirit of the Penobscot canoe lives on in every paddle stroke.

Modern Relevance

Despite its rich history, the Old Town Canoe Company remains remarkably relevant in the modern era. The Guide 147, for example, exemplifies how Old Town has successfully blended traditional designs with contemporary materials and manufacturing techniques. While the company began with wood-and-canvas canoes, it has adapted to changing times by incorporating durable and low-maintenance polyethylene into its construction.

This shift has allowed Old Town to produce canoes that are accessible to a wider range of paddlers, including recreational users and families. The Guide 147’s stability, versatility, and affordability make it an excellent choice for leisurely paddling, fishing trips, and exploring calm waters.

Furthermore, Old Town’s commitment to sustainability and environmental responsibility resonates with today’s consumers; By using recyclable materials and promoting responsible paddling practices, the company demonstrates its dedication to preserving the natural environment for future generations. In a world where many companies prioritize profit over purpose, Old Town stands out as a brand that values both its heritage and its impact on the planet, ensuring that its canoes remain relevant for years to come.

Identifying and Dating Old Town Canoes

Identifying and dating an Old Town canoe is a fascinating endeavor, often pursued by members of the Wooden Canoe Heritage Association (WCHA); Fortunately, Old Town maintained detailed records, making it possible to trace the history of many of their canoes.

The most crucial piece of information is the canoe’s serial number, typically found on the stem or near the deck. With this number, one can contact the Old Town Canoe Company or consult their online resources to access the original build record. This record reveals the canoe’s model, length, grade, construction materials, and original shipping date.

Additional clues can be gleaned from the canoe’s features. For instance, the presence of specific hardware, such as certain types of seat hangers or deck plates, can help narrow down the manufacturing period. The type of wood used for planking and trim, as well as the canvas covering, can also provide valuable information. However, modifications and repairs over the years can complicate the identification process, so consulting with experienced canoe restorers or WCHA members is often recommended.

While dating a newer polyethylene Old Town Guide 147 canoe is easier due to more recent records, understanding these historical methods adds appreciation for Old Town’s legacy.