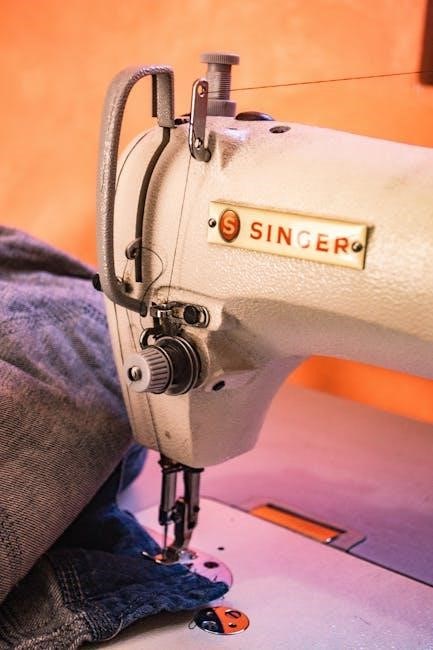
first aid 2024 pdf

2024 First Aid Guidelines: An Overview

The American Heart Association (AHA) and American Red Cross (ARC) co-authored and released the 2024 First Aid Guidelines‚ offering critical updates based on evidence-based practices. These guidelines equip responders to effectively handle emergencies‚ from mild to life-threatening situations.

Co-Authorship and Release

The 2024 First Aid Guidelines represent a collaborative effort between the American Heart Association (AHA) and the American Red Cross (ARC). This partnership‚ ongoing since 2005‚ ensures the guidelines reflect the most current and evidence-based practices in first aid. The guidelines were officially released on November 14‚ 2024‚ marking a significant update to first aid protocols. This release follows a structured review of evidence from the International Liaison Committee on Resuscitation (ILCOR)‚ ensuring alignment with global resuscitation standards. The updated guidelines aim to provide first responders with the knowledge and skills necessary to effectively manage a wide range of medical emergencies. These emergencies encompass critical‚ common medical‚ traumatic‚ environmental‚ and toxicological conditions‚ improving patient outcomes.

Key Updates in the 2024 Guidelines

The 2024 guidelines provide detailed guidance on opioid overdoses‚ tick bites‚ and fainting. They also cover open chest wounds‚ bleeding‚ spinal motion restriction‚ seizures‚ heatstroke‚ hypothermia‚ frostbite‚ chest pain‚ and stroke.

Expanded Scope of Conditions

The 2024 First Aid Guidelines represent a comprehensive update‚ broadening the scope of conditions addressed compared to previous versions. Moving beyond basic first aid‚ the guidelines now offer detailed instructions for managing a wider array of medical‚ traumatic‚ environmental‚ and toxicological emergencies. This expansion includes specific guidance for situations such as open chest wounds‚ external bleeding management‚ and proper techniques for spinal motion restriction when injuries are suspected.

Furthermore‚ the updated guidelines provide protocols for addressing seizures‚ heatstroke‚ hypothermia‚ and frostbite‚ ensuring responders are equipped to handle diverse temperature-related emergencies. The inclusion of chest pain and stroke management protocols further enhances the guidelines’ comprehensive nature‚ providing critical information for time-sensitive interventions.

Opioid Overdose Management

A significant addition to the 2024 First Aid Guidelines is the inclusion of detailed guidance on managing opioid overdoses. Recognizing the increasing prevalence of opioid-related emergencies‚ the guidelines provide clear and concise instructions for first responders. This includes recognizing the signs and symptoms of an opioid overdose‚ such as slowed or stopped breathing and unresponsiveness.

The guidelines emphasize the importance of administering naloxone‚ a life-saving medication that can reverse the effects of opioids. They provide step-by-step instructions on how to administer naloxone‚ whether through intramuscular injection or nasal spray. Crucially‚ the guidelines also stress the need to call for emergency medical services immediately‚ even after administering naloxone‚ as the effects of the medication may wear off.

Tick Bite Management

The 2024 First Aid Guidelines address the growing concern of tick-borne illnesses by providing updated recommendations for tick bite management. The guidelines emphasize the importance of prompt and proper tick removal to minimize the risk of disease transmission. They recommend using fine-tipped tweezers to grasp the tick as close to the skin’s surface as possible and pulling upward with steady‚ even pressure.

The updated guidelines advise against using methods like burning or coating the tick with substances‚ as these can increase the risk of infection. After removing the tick‚ the area should be cleaned thoroughly with soap and water. The guidelines also recommend monitoring for signs of illness‚ such as rash or fever‚ and seeking medical attention if symptoms develop.

Organizations Involved

The 2024 First Aid Guidelines are a collaborative effort between the American Heart Association (AHA) and the American Red Cross (ARC). These organizations are leading providers of first aid training.

American Heart Association (AHA)

The American Heart Association is a founding member of the International Liaison Committee on Resuscitation (ILCOR)‚ reflecting its commitment to resuscitation science. AHA’s guidelines are used worldwide to train millions in CPR‚ emergency cardiovascular care‚ and first aid. They co-developed the 2024 First Aid Guidelines with the American Red Cross‚ incorporating ILCOR evidence reviews. The AHA provides detailed guidance on various scenarios‚ including those involving chest pain and stroke. They promote high-quality CPR and offer training resources. The AHA plays a vital role in disseminating the latest resuscitation science and practices.

American Red Cross (ARC)

The American Red Cross collaborated with the American Heart Association to co-develop the 2024 First Aid Guidelines‚ representing a comprehensive update since 2010. The ARC‚ alongside the AHA‚ incorporated structured evidence reviews from the International Liaison Committee on Resuscitation (ILCOR). These guidelines address diverse emergencies‚ covering medical‚ traumatic‚ environmental‚ and toxicological conditions. The American Red Cross has been added as a resource for HOSA CPR/First Aid guidelines. The ARC’s involvement ensures that first aid education aligns with current best practices. The joint guidelines provide official clinical practice recommendations‚ enhancing the effectiveness of first aid interventions.

Impact on Training and Courses

While immediate changes to Heartsaver courses aren’t planned‚ the training network should be aware of the science within the 2024 First Aid Guidelines. This ensures that future training reflects the most up-to-date information.

Heartsaver Courses

Currently‚ there will be no immediate changes made to Heartsaver courses or the associated training materials. However‚ it is crucial for the entire Training Network to be well-informed and aware of the updated scientific evidence presented in the 2024 Guidelines for First Aid. This awareness will ensure that the knowledge base of instructors and participants remains current and aligned with the latest recommendations in first aid practices.

The American Heart Association and American Red Cross jointly developed these guidelines‚ representing the first comprehensive update to first aid treatment recommendations since 2010. While the existing Heartsaver course content remains valid‚ understanding the new guidelines will enhance the quality and effectiveness of training.

Workplace First Aid Requirements

Business owners are adapting to changes in occupational health and safety regulations‚ requiring updates to workplace first aid requirements. New guidelines and resources are available to understand these regulatory changes for compliance.

Changes to Regulations

Several changes to workplace first aid regulations are taking effect. To assist in preparing for these new requirements‚ information about the updated workplace first aid curriculum and additional resources are being shared. These resources aim to help understand the first aid regulatory changes and ensure compliance.

Preliminary guidelines offer detailed information on the website. The new guidelines move beyond basic first aid to provide specific guidance on scenarios such as opioid overdoses and tick bites. The full guidelines are accessible on the First Aid Guidelines webpage. The goal is to improve workplace safety through updated protocols.

International Liaison Committee on Resuscitation (ILCOR)

The 2024 first aid guidelines demonstrate alignment with the International Liaison Committee on Resuscitation (ILCOR). The American Heart Association (AHA) is a founding member‚ and the International Federation of Red Cross and Red Crescent Societies is a collaborating member. ILCOR conducts structured evidence reviews‚ informing the updated recommendations.

These reviews cover various medical‚ traumatic‚ environmental‚ and toxicological conditions. The resulting guidelines offer clinical practice recommendations for first aid. The collaboration with ILCOR ensures that the guidelines are based on the most up-to-date resuscitation science. This partnership enhances the quality and effectiveness of first aid practices globally‚ promoting better outcomes in emergency situations.

HOSA CPR/First Aid Guidelines

The HOSA CPR/First Aid ILC Guidelines (October 2024) expect competitors to be aware of all content within the guidelines. The American Red Cross has been added as a resource for 2023-2024.

American Red Cross as a Resource

The 2024 HOSA CPR/First Aid guidelines now recognize the American Red Cross as a valuable resource. This addition means that for any discrepancies in CPR or First Aid steps between the American Heart Association and the American Red Cross‚ either set of guidelines can be utilized. During competitions‚ teams are expected to clearly communicate which organization’s guidelines they are following. This inclusion of the Red Cross reflects a broader approach to first aid education. This ensures that competitors are familiar with multiple accepted methodologies. This flexibility aims to prepare HOSA members for real-world scenarios where familiarity with diverse techniques can be life-saving. This update enhances the practical application of first aid knowledge within HOSA competitions.

gypsum association manual

Gypsum Association Manual: A Comprehensive Guide

The Gypsum Association Manual serves as a comprehensive guide‚ providing essential information on gypsum-based building materials and systems‚ promoting understanding within the construction industry and related trade associations‚ fostering growth and development.

Overview of the Gypsum Association

The Gypsum Association‚ a not-for-profit trade association founded in 1930‚ champions the use of gypsum-based products and systems. Its mission encompasses promoting gypsum while advancing the gypsum industry’s development and welfare in the United States and Canada‚ representing its member companies. The association provides technical assistance‚ publications‚ and educational resources regarding gypsum panels‚ their applications‚ performance‚ and sustainability.

The Gypsum Association actively engages with the wider construction industry and relevant trade associations‚ guided by documents like GA-214‚ which outlines various levels of finish for gypsum panel products. This guidance ensures appropriate selection based on intended use and lighting conditions. The association’s efforts contribute to a broader understanding and effective utilization of gypsum in construction‚ ensuring quality and safety.

Mission and Objectives of the Gypsum Association

The Gypsum Association‚ established in 1930‚ holds a core mission to promote the utilization of gypsum products. This involves championing gypsum-based building materials and systems within the construction sector. A key objective is advancing the development‚ growth‚ and general welfare of the gypsum industry across the United States and Canada‚ acting on behalf of its member companies.

The association aims to foster a deeper understanding of gypsum-based materials‚ ensuring they are effectively used in construction. Through technical support‚ educational initiatives‚ and comprehensive publications‚ the Gypsum Association strives to elevate industry standards‚ promote safety‚ and encourage sustainable practices related to gypsum products.

Member Companies of the Gypsum Association

The Gypsum Association is honored to comprise a diverse group of member companies‚ essential to the gypsum industry’s progress. Regular members include American Gypsum Company LLC‚ CertainTeed Gypsum‚ Inc.‚ CertainTeed Gypsum Canada‚ Inc.‚ Georgia-Pacific Gypsum LLC‚ National Gypsum Company‚ PABCO Gypsum‚ United States Gypsum Company‚ and CGC Inc.‚ showcasing a strong presence in the market.

Associate members‚ such as Cabot Gypsum Company and Panel Rey‚ S. A.‚ contribute valuable perspectives and expertise. This collaborative network ensures the association can effectively promote gypsum usage‚ advance industry standards‚ and support the overall welfare of the gypsum sector in North America through shared knowledge and resources.

Key Publications and Resources

The Gypsum Association offers key publications and resources‚ including GA-600 for fire resistance and sound control‚ GA-214 detailing finish levels‚ and various technical documents‚ providing comprehensive guidance and standards.

GA-600: Fire Resistance and Sound Control Design Manual

GA-600‚ the Fire Resistance and Sound Control Design Manual‚ is a crucial Gypsum Association publication‚ updated every three years. This manual has been referenced by model building codes for over 40 years‚ offering fire-resistive designs. The 2018 edition‚ almost 400 pages‚ features over 140 new systems supplementing existing ones.

It incorporates sound‚ structural‚ and assembly details in addition to fire safety information. This document provides essential fire-resistance data‚ widely distributed to architects and building officials. The manual aids in selecting appropriate construction methods to meet fire safety and acoustic requirements.

GA-600 provides a thorough reference for designing fire-resistant and sound-controlled environments‚ it serves as a cornerstone resource for professionals seeking to ensure safety and compliance in building projects‚ with its comprehensive data‚ GA-600 remains an indispensable tool.

GA-214: Levels of Finish for Gypsum Panel Products

GA-214‚ Levels of Finish for Gypsum Panel Products‚ offers guidance on finishing gypsum panels before decoration. It outlines five finish levels (0-5)‚ each suited for specific purposes and appearances. Choosing the right level depends on the space’s use and lighting conditions‚ with the document providing recommendations for finishing gypsum panels.

It effectively instructs wallboard finishers on techniques for specific finish qualities‚ it covers terminology‚ mock-ups‚ and finish levels for various gypsum panel types and locations. GA-214 ensures proper techniques for different finish levels‚ aiding professionals in achieving desired aesthetics and performance.

Revised and published with a video‚ GA-214 is a go-to guide for achieving the desired look for gypsum panel finishes. It helps construction workers understand how to choose the right finish.

Other Technical Documents and Publications

Beyond GA-600 and GA-214‚ the Gypsum Association provides various technical documents and publications. These resources cover gypsum board types‚ sizes‚ standards‚ installation‚ and repair. They also include guidelines for specific applications‚ such as manufactured housing. These documents are available as Adobe PDFs‚ offering easy access to vital information.

Documents like GA-236-2017‚ GA-253-2018‚ and GA-801-2017 are available in Spanish and French‚ expanding accessibility. These publications address topics like proper installation techniques and performance characteristics‚ aiding professionals in making informed decisions. The Gypsum Association constantly updates its library to reflect the latest industry advancements and best practices.

These resources also offer insights into sustainability‚ including Life-Cycle Assessment Summaries and Environmental Product Declarations. These technical documents and publications ensure that industry professionals and workers have all the information that they need.

Technical Aspects and Standards

This section delves into the technical aspects and standards of gypsum board‚ covering board types‚ installation‚ finishing techniques‚ and relevant ASTM and CSA standards‚ ensuring quality and performance in gypsum board applications.

Gypsum Board Types‚ Uses‚ and Standards

This section elucidates the various gypsum board types available‚ detailing their specific uses‚ sizes‚ and applications within construction. A comprehensive overview of the standards governing gypsum board manufacturing and quality is provided‚ including references to ASTM and CSA standards. Specific board types like Type X‚ with fire-resistant properties‚ and glass mat gypsum sheathing are discussed‚ highlighting their unique characteristics and appropriate applications.

Information on selecting the right gypsum board for specific applications is presented‚ considering factors like fire resistance‚ sound control‚ and moisture resistance. The section also covers the standards that ensure the gypsum panels performance and overall compliance. This includes the standards to determine the levels of finish.

Learn about gypsum panels‚ their applications‚ performance‚ and sustainability with the appropriate standards. The correct selection of gypsum board is crucial for achieving desired performance characteristics in building assemblies.

Installation and Finishing Techniques

This section covers the proper installation of gypsum board‚ crucial for achieving optimal performance and longevity. Detailed instructions are provided‚ encompassing cutting‚ fastening‚ and joint treatment techniques. Emphasis is placed on selecting appropriate tools and materials‚ ensuring compliance with industry best practices. The Gypsum Association’s GA-214‚ “Levels of Finish for Gypsum Panel Products‚” serves as a guiding document for achieving desired finish quality.

The section also covers the five levels of finish‚ ranging from Level 0 to Level 5‚ each serving a specific purpose and offering a distinct appearance. Proper techniques for achieving each level are outlined‚ including recommendations for joint taping‚ mudding‚ and sanding. Knowing which level to choose depends on the intended use of the space and the lighting conditions.

Surface preparation‚ priming‚ and painting techniques are also addressed‚ ensuring a professional and durable finished surface. Proper installation and finishing greatly enhance the durability and lifespan of gypsum board assemblies.

ASTM and CSA Standards for Gypsum Board

This section details the critical ASTM (American Society for Testing and Materials) and CSA (Canadian Standards Association) standards governing gypsum board. These standards ensure consistent quality‚ performance‚ and safety across various gypsum board products. Key standards‚ such as ASTM C1396 for gypsum board specifications‚ are explained in detail‚ covering requirements for dimensions‚ weight‚ and physical properties.

The section also addresses testing methodologies used to verify compliance with these standards‚ including fire-resistance tests‚ sound transmission tests‚ and structural load tests. Understanding these standards is crucial for architects‚ contractors‚ and specifiers to select appropriate gypsum board products for specific applications.

Furthermore‚ this section highlights how these standards influence building codes and regulations‚ ensuring the safe and effective use of gypsum board in construction. It also covers the certification process and the role of third-party testing agencies in verifying product compliance‚ promoting confidence in the reliability of gypsum board.

History and Evolution

This section explores the Gypsum Association’s rich history‚ from its founding to its present-day activities. It highlights key milestones‚ significant developments‚ and the association’s continuous evolution in response to industry needs and technological advancements.

Founding and Early Years of the Gypsum Association

The Gypsum Association was formally established after several constituents in the gypsum industry agreed that a formal association offered a number of advantages. Over continuing to operate as Gypsum Industries‚ an informal research and standard-setting group. At the first meeting of the Gypsum Association‚ James Leenhouts was elected as President.

Henry J. Schweim was hired as the engineer of the Association. Schweim‚ now Secretary of the Corporation and Chief Executive Officer‚ establishes the Associations first office in Chicago. The Technical Problems Committee requests and receives approval to conduct four fire tests with the National Bureau of Standards. The Association expands its criteria for membership eligibility.

The Pacific Coast division of the Gypsum Association emerges. The Association appoints an Advertising and Promotional Committee‚ working to develop a more fire-resistant gypsum board‚ publishing “The ABCs of Plastering” to educate contractors and architects.

Key Milestones and Developments

During the post-war housing boom‚ the Technical Problems Committee sought Underwriters Laboratories labeling for gypsum sheathing. A 1-hour fire-rated system was achieved‚ leading to the “Fire Resistance Design Data Manual”. The Association’s Board of Directors votes to incorporate. In response to demand‚ 20‚000 copies of the manual were distributed to architects.

The Technical Problems Committee recommends including sound‚ structural‚ and assembly information‚ in addition to fire safety-information‚ in the manual. By the early 1970s‚ the use of gypsum board in apartment and office buildings has grown substantially‚ due in large part to its fire-resistant and sound-attenuation properties.

All model building codes reference the “Fire Resistance Data Design Manual” as a source of fire-resistive designs. The Technical Problems Committee begins work on product standards for gypsum products used in manufactured housing. These milestones mark significant advancements in gypsum product development and industry standards.

Recent Activities and Initiatives

The Gypsum Association (GA) has recently focused on sustainability‚ completing a Life-Cycle Assessment Summary of gypsum board and publishing its first Type III Environmental Product Declaration (EPD) for Type X North American Gypsum Boards.

The GA released the 23rd edition of GA-600 “Fire Resistance and Sound Control Design Manual”‚ offering a PDF version for the first time. This edition contains an expanded section on acoustics and provides the option of a more robust e-version of the “Manual”. The Association expands its library of Spanish and French publications.

The GA introduced a new series of videos‚ “GA-600 Explained”‚ and returns to in-person attendance at industry conferences. The GA also rebrands and introduces a new logo‚ embracing both the traditional and more contemporary aspects of the Association’s mission. These initiatives demonstrate the GA’s commitment to innovation and industry leadership.

name change checklist after marriage pdf

Embarking on post-wedding life? A marriage name change checklist in PDF format is invaluable․ It ensures all vital documents‚ accounts‚ and records reflect your new legal name․ Downloadable and printable‚ this comprehensive checklist streamlines the often overwhelming process of updating your identity after marriage

Following a joyous wedding‚ many individuals opt to change their last name‚ a symbolic gesture of unity․ However‚ this seemingly simple decision triggers a cascade of administrative tasks․ Updating your name across various platforms‚ from legal documents to personal accounts‚ can quickly become a daunting endeavor․

This is where a comprehensive checklist becomes absolutely essential․ A well-structured marriage name change checklist serves as a roadmap‚ guiding you through each necessary step with clarity and precision․ Without it‚ crucial updates might be overlooked‚ leading to potential complications down the line․

Imagine forgetting to update your Social Security card or driver’s license․ Such oversights can create issues when applying for loans‚ traveling internationally‚ or even verifying your identity in everyday situations․ A checklist mitigates these risks‚ ensuring a smooth and organized transition to your new name․

Moreover‚ a checklist saves valuable time and reduces stress․ Instead of scrambling to remember which documents need updating‚ you can systematically work through the list‚ ticking off each item as you go․ This proactive approach empowers you to manage the name change process efficiently‚ allowing you to focus on enjoying your newlywed life․

Step 1: Obtaining Your Marriage Certificate

The very first step in the name change process after marriage is securing your official marriage certificate․ This document serves as the foundational proof of your union and is required by virtually every institution and agency when updating your name․ Without it‚ you simply cannot proceed with any subsequent steps․

Typically‚ your marriage certificate will be issued by the county clerk’s office or vital records department in the jurisdiction where your marriage license was obtained․ The process for obtaining it may vary slightly depending on your location‚ so it’s best to check with the relevant local authorities for specific instructions․

In many cases‚ you will receive a temporary marriage license immediately after the ceremony‚ but this is not the official certificate․ The official certificate usually takes a few weeks to process and will be mailed to you or available for pickup․ Make sure to request a certified copy‚ as this is often required and will be returned to you․

Keep your certified marriage certificate safe and secure‚ as you will need to present it multiple times throughout the name change process․ Consider making several photocopies to avoid repeatedly handling the original․ This crucial document unlocks the door to legally changing your name and embarking on your new chapter with confidence․

Step 2: Social Security Card Update

Once you have your certified marriage certificate‚ the next crucial step is updating your name with the Social Security Administration (SSA)․ This is often considered the first official step in the name change process because your Social Security card serves as a primary form of identification and is linked to various government agencies and financial institutions․

To update your Social Security card‚ you’ll need to complete an Application for a Social Security Card (Form SS-5)․ This form can be downloaded from the SSA website or obtained at your local Social Security office․ Along with the application‚ you’ll need to provide your certified marriage certificate and proof of identity‚ such as your driver’s license or passport․

The good news is that updating your name on your Social Security card is free․ You can submit your application and documents in person at a Social Security office or mail them in․ If mailing‚ it’s advisable to send certified copies of your documents rather than the originals‚ as the SSA may not return them․

After processing your application‚ the SSA will issue you a new Social Security card with your updated name․ This card will not display your signature‚ but it’s essential to keep it safe and secure․ Updating your Social Security card is a fundamental step that paves the way for updating other important documents and accounts․

Step 3: Updating Your Driver’s License/State ID

Following your Social Security card update‚ the next essential step is to update your driver’s license or state identification card․ This is crucial as these documents serve as primary forms of identification in various everyday situations‚ from opening bank accounts to traveling domestically․

Each state has its own specific requirements and procedures for updating your driver’s license․ Generally‚ you’ll need to visit your local Department of Motor Vehicles (DMV) or equivalent agency․ Be sure to bring your updated Social Security card‚ your certified marriage certificate‚ and your current driver’s license or state ID․

Some states may require you to complete an application form and pay a fee for the updated license․ It’s advisable to check your state’s DMV website for specific instructions and required documents before your visit․ In some cases‚ you may need to take a new photo for your updated license․

Updating your driver’s license or state ID is important not only for identification purposes but also for ensuring that your records with law enforcement and other state agencies are accurate․ Keep in mind that you typically have a limited time frame after your name change to update your driver’s license‚ so it’s best to address this step promptly․

Step 4: Passport Name Change

If you plan to travel internationally‚ updating your passport with your new name is a critical step in the marriage name change process․ The process for changing the name on your passport depends on how recently your current passport was issued․

If your passport was issued within the last year‚ you can use Form DS-5504‚ the “Name Change‚ Data Correction‚ and Limited Passport Book Replacement” form․ You’ll need to submit this form along with your marriage certificate and your current passport․ There is typically no fee for this service if you meet the eligibility requirements․

If your passport was issued more than a year ago‚ you’ll need to use either Form DS-82 or Form DS-11․ Form DS-82 is the “Passport Renewal Application for Eligible Individuals‚” which you can use if your passport is undamaged‚ was issued when you were at least 16 years old‚ and was issued within the last 15 years․ Otherwise‚ you’ll need to use Form DS-11‚ the “Application for a U․S․ Passport․” This form requires you to appear in person at a passport acceptance facility and provide proof of identity and citizenship‚ along with your marriage certificate․

Regardless of the form you use‚ be sure to include a certified copy of your marriage certificate as proof of your name change․ Processing times for passport applications can vary‚ so it’s wise to apply well in advance of any planned international travel․

Step 5: Updating Bank Accounts and Financial Institutions

After updating your identification documents‚ the next crucial step in your name change journey is notifying all your banks and financial institutions․ This includes updating your name on all checking accounts‚ savings accounts‚ credit cards‚ loans‚ and investment accounts․

Start by contacting each institution to inquire about their specific name change procedures․ Most banks will require you to provide a certified copy of your marriage certificate and a form of photo identification‚ such as your updated driver’s license or passport․ Some institutions may have their own name change forms that you’ll need to complete․

For credit cards‚ you can typically update your name by calling the customer service number on the back of the card or by logging into your online account․ Be prepared to provide a copy of your marriage certificate if requested․

Don’t forget to update your name on any loans‚ mortgages‚ or investment accounts you may have․ This may involve submitting additional documentation and completing specific forms․ It’s important to ensure that all your financial records accurately reflect your new name to avoid any potential issues with transactions‚ credit reports‚ or legal matters․

Keeping your financial information up-to-date is essential for maintaining financial stability and ensuring a smooth transition after marriage

Step 6: Notifying Your Employer and Updating Payroll Information

Once you’ve updated your identification and financial documents‚ it’s time to inform your employer about your name change․ This step is crucial for ensuring accurate payroll processing‚ tax reporting‚ and benefits administration․

Start by notifying your HR department or supervisor about your name change․ They will likely require you to provide a copy of your marriage certificate and may have specific forms for you to complete․ These forms will typically include your new name‚ Social Security number‚ and other relevant information․

Updating your name with your employer will ensure that your paychecks‚ W-2 forms‚ and other employment-related documents accurately reflect your new legal name․ It will also prevent any potential issues with tax filings or benefit claims․

If you participate in any employer-sponsored benefits programs‚ such as health insurance‚ life insurance‚ or retirement plans‚ be sure to update your name on those accounts as well․ This will ensure that your beneficiaries are correctly identified and that your coverage remains valid․

Additionally‚ update your name on your employee ID badge‚ email signature‚ and any other internal systems or directories used by your employer․ This will help maintain consistency and avoid confusion among colleagues and clients․

By promptly notifying your employer and updating your payroll information‚ you can ensure a seamless transition and avoid any potential complications related to your name change

Step 7: Updating Voter Registration

After legally changing your name after marriage‚ updating your voter registration is a crucial civic duty․ Ensuring your voter registration reflects your new name guarantees your right to vote in upcoming elections and accurately represents your identity in official records․

The process typically involves completing a voter registration form‚ which can usually be found online through your state or local election office’s website․ You may also be able to obtain a form at your local Department of Motor Vehicles (DMV) or library․

When filling out the form‚ be sure to provide your full legal name‚ including your updated last name‚ as well as your current address‚ date of birth‚ and other required information․ You will likely need to provide a copy of your driver’s license or other form of identification that reflects your new name․

Once you have completed the form‚ you can typically submit it online‚ by mail‚ or in person at your local election office․ Be sure to check the deadline for voter registration in your state to ensure that your form is submitted on time․

Updating your voter registration is a simple but important step in ensuring that your voice is heard in the democratic process․ By taking the time to update your registration‚ you can help ensure that elections are fair‚ accurate‚ and representative of the will of the people․

Step 8: Updating Insurance Policies (Health‚ Life‚ Auto)

Post-marriage name change necessitates updating all insurance policies – health‚ life‚ and auto․ This ensures accurate coverage and prevents claim complications․ Contact each insurance provider promptly‚ typically requiring a copy of your marriage certificate or a certified name change document․

For health insurance‚ notify your insurer to update your records and issue a new insurance card reflecting your new name․ This is crucial for seamless medical billing and access to healthcare services․

Life insurance policies also require immediate updates․ Ensure your beneficiary information and policyholder name align with your current legal name to avoid potential disputes or delays in claim processing․

Similarly‚ update your auto insurance policy with your new name; This ensures that your driver’s license and insurance information match‚ which is essential for legal compliance and in the event of an accident․

Neglecting to update your insurance policies can lead to confusion‚ claim denials‚ or even policy cancellations․ Proactive communication with your insurance providers ensures continuous coverage and peace of mind‚ solidifying your financial and personal security after marriage

Step 9: Updating Utilities and Postal Service

Following a marriage and name change‚ it’s crucial to update your name with utility companies and the postal service․ This step ensures uninterrupted services and accurate mail delivery to your residence․

Begin by contacting each utility provider – gas‚ electricity‚ water‚ internet‚ and cable – to inform them of your name change․ Most providers require a copy of your marriage certificate or a legal document verifying the name change․ Updating your account details prevents billing issues and ensures that all future correspondence reflects your new name․

Next‚ update your name with the United States Postal Service (USPS) to ensure that mail is correctly delivered․ You can submit a change-of-address form online or at your local post office․ This form allows you to forward mail addressed to your former name to your current address‚ minimizing the risk of missed deliveries or lost correspondence․

Updating both utilities and the postal service is a vital step in solidifying your new identity and maintaining essential services․ It demonstrates attention to detail and helps streamline your transition into married life by ensuring seamless communication and service provision․

Step 10: Updating Credit Cards and Loans

After a marriage and subsequent name change‚ updating your credit cards and loan accounts is an essential step in aligning your financial identity․ This process ensures that your credit history remains accurate and prevents potential issues with transactions or creditworthiness․

Begin by contacting each credit card issuer and lender to inform them of your name change․ Most financial institutions require you to provide a copy of your marriage certificate or another legal document that officially verifies your new name․ You can typically submit these documents online‚ by mail‚ or in person at a local branch․

Updating your name on credit cards prevents confusion during purchases and ensures that your statements reflect your current legal name․ Similarly‚ updating loan accounts‚ such as mortgages‚ auto loans‚ and personal loans‚ is crucial for maintaining accurate records and avoiding any discrepancies that could affect your credit score․

By proactively updating your credit cards and loans‚ you safeguard your financial reputation and ensure a smooth transition into married life․ This step demonstrates diligence in managing your financial affairs and helps prevent potential complications in the future․

Step 11: Updating Legal Documents (Will‚ Trust‚ etc․)

Following a name change after marriage‚ it is critically important to update all relevant legal documents to reflect your new legal name․ This includes essential documents such as your will‚ trust‚ power of attorney‚ healthcare directive‚ and any other legally binding agreements․

Failing to update these documents can lead to significant complications in the event of unforeseen circumstances‚ such as incapacity or death․ Outdated legal documents may create confusion regarding your identity and intentions‚ potentially leading to legal challenges or delays in executing your wishes․

Consult with an attorney specializing in estate planning to ensure that your legal documents are properly amended and updated․ They can guide you through the necessary steps to legally change your name on these documents and ensure that they remain valid and enforceable․

Updating your will and trust is particularly important for ensuring that your assets are distributed according to your wishes․ Similarly‚ updating your power of attorney and healthcare directive allows your designated representatives to make decisions on your behalf if you are unable to do so․ By taking these steps‚ you protect your interests and provide clarity for your loved ones․

Staying Organized and Ensuring a Smooth Transition

Navigating a name change after marriage requires diligence and organization․ Using a checklist‚ like a marriage name change checklist PDF‚ is crucial for maintaining control throughout the process․ By systematically working through each step‚ from updating your Social Security card to revising legal documents‚ you can ensure a seamless transition․

Remember to keep copies of all updated documents and confirmations․ A well-organized file‚ either physical or digital‚ will be invaluable should any questions or discrepancies arise․ Patience is key‚ as some updates may take longer than others․ Don’t hesitate to follow up with institutions if you haven’t received confirmation within a reasonable timeframe․

The effort invested in staying organized will pay dividends in the long run‚ preventing potential headaches and ensuring that your new identity is properly reflected across all aspects of your life․ Embrace this transition as a fresh start‚ and enjoy the peace of mind that comes with knowing you’ve taken all the necessary steps to update your name accurately and completely․

By using a checklist and remaining proactive‚ you can confidently navigate this significant life event․

madeira embroidery thread conversion chart pdf

Understanding Madeira Embroidery Thread Conversion Charts

Madeira embroidery thread conversion charts are essential tools for embroiderers. These charts facilitate the translation of color codes between different thread brands. They are crucial for ensuring accurate color matching when working with diverse designs. They also help manage thread inventory more effectively. Using the charts makes it easier to work on projects.

Purpose of Conversion Charts

The primary purpose of Madeira embroidery thread conversion charts is to enable seamless transitions between different thread brands and types. These charts address the common challenge of varying color codes and numbering systems across manufacturers. They allow embroiderers to use threads they already own or readily available options while maintaining the integrity of a design’s color scheme. For instance, if a pattern specifies a Madeira rayon thread, a conversion chart helps identify its equivalent in a different brand, such as Robison-Anton or Sulky. This avoids the need to purchase threads from a particular manufacturer each time, thus making embroidery more flexible and cost-effective. Additionally, these charts help manage thread inventories efficiently by providing cross-references that prevent the duplication of similar colors. They are incredibly useful when converting between different types of threads from the same brand, such as Madeira rayon to Madeira polyester, which might have slight color differences. In essence, conversion charts offer a standardized approach to color matching, ensuring that the final embroidered product aligns with the designer’s intent, irrespective of thread brand choices.

Types of Madeira Thread Conversion

Madeira thread conversion charts primarily focus on two main types of conversions⁚ rayon to polyester and vice versa, along with conversions to other brands. Within the Madeira line, the most common conversion is between their Classic Rayon and Polyneon Polyester threads. This is due to the differing properties and uses of the two materials; rayon is known for its sheen and is preferred for more delicate projects, while polyester offers better durability and colorfastness, suitable for items that require frequent washing. Another important type of conversion involves matching Madeira threads to those of other major manufacturers. For example, charts exist to convert Madeira colors to those from brands like Robison-Anton, Sulky, and Brother. These are crucial because designers often specify thread colors from a particular brand, and embroiderers may not have access to those exact threads. These external brand conversions allow users to achieve the closest possible color match while using threads they already have. These charts might also include conversions to Pantone colors for a broader color matching framework. The goal is always to ensure that the final product is as close to the intended color palette as possible.

Rayon to Polyester Conversion

Converting from Madeira Rayon to Madeira Polyester thread is a common necessity for embroiderers. Rayon, with its high sheen, is often favored for decorative projects, while polyester is chosen for its durability and washability. This conversion is important when a design specifies rayon, but the project requires the robustness of polyester. The conversion charts provide a direct color match, showing the equivalent polyester shade for each rayon color. These charts typically list the Madeira rayon color number alongside the corresponding Madeira polyester number. This ensures that the same hue is achieved, although subtle differences in luster and texture may exist. It is important to note that while the colors are matched, the characteristics of the threads differ. For example, rayon is more prone to breakage and less resistant to fading, which makes polyester a better choice for garments and other items that will be washed. These charts help users to make informed decisions about thread selection based on the requirements of their projects. The availability of reliable conversion charts makes this substitution straightforward and prevents color mismatches.

Polyester to Rayon Conversion

The process of converting from Madeira Polyester thread to Madeira Rayon thread is essential when a design is intended for polyester but the desired finish requires the unique sheen of rayon. This conversion is crucial for projects where the visual appeal of rayon is prioritized over the durability of polyester. Conversion charts provide a direct mapping, listing the corresponding rayon shade for each polyester color. These charts are designed to ensure that the color remains consistent, although the visual texture and luster may differ. While polyester is known for its strength and colorfastness, rayon offers a softer, more lustrous appearance. Therefore, the need to convert from polyester to rayon often arises when embroidering decorative items that require a premium finish. Such charts are usually organized with the polyester color number followed by its rayon counterpart, making it simple for embroiderers to locate the correct match. Users must, however, be aware that rayon might not be as resilient as polyester. This means that for projects that will undergo frequent washing or handling, the choice of thread should be carefully considered. Having reliable charts makes this substitution easier and prevents mismatches.

Other Brand Conversions to Madeira

Beyond conversions between Madeira’s own lines, embroiderers often need to translate colors from other brands to Madeira threads. This is where comprehensive conversion charts become invaluable. These resources typically list major thread manufacturers such as Brother, Sulky, Robison-Anton, and ThreadArt, providing the closest Madeira color equivalent for each of their shades. These charts are essential because embroidery designs frequently specify a particular brand of thread. If an embroiderer prefers to work with Madeira, or perhaps only has that brand available, the charts allow seamless substitution. These conversions are not always one-to-one; the charts provide the nearest color match available. Some charts may even include multiple Madeira options for a single color from another brand, allowing the embroiderer a choice based on their preference. Due to slight color variations between thread brands, referring to physical color cards alongside the charts is helpful. These physical cards are essential to ensure the color matches the desired outcome, especially for those projects where precise colors are required. Moreover, the charts help in managing one’s thread stash effectively by identifying which Madeira thread can be used instead of those from other brands.

Using Online Conversion Tools

Online conversion tools offer a convenient alternative to traditional PDF charts for converting thread colors. These digital resources typically allow users to input a thread color from one brand and instantly receive the closest matching color from another. For example, an embroiderer can input a Brother thread number and find the equivalent Madeira color. Many websites provide these tools, often as a free service, making them easily accessible to all users. These online tools often include searchable databases of various thread brands, thereby expanding their utility beyond just Madeira. They also frequently allow you to select multiple thread brands to compare, providing a broader range of options for the user. The speed and ease of use of these tools are major benefits, enabling embroiderers to quickly determine the best thread substitution. Furthermore, some online converters have additional features such as suggesting related colors. However, it’s important to note that while convenient, online tools should be used with caution. Display variations on computer screens can sometimes distort colors, so relying solely on digital representations may lead to discrepancies. Combining online tools with a physical color card is the most accurate way to ensure a perfect color match.

Importance of Physical Color Cards

While online tools and PDF conversion charts offer convenience, physical color cards hold significant importance in the world of embroidery thread. These cards provide a tangible representation of thread colors, eliminating the distortions that can occur on computer screens. The actual threads are attached to the card, allowing for a precise comparison of shades and hues. This is particularly vital when working with subtle color variations that might be lost in digital translations. The tactile experience of physically seeing and feeling the threads enables a more accurate understanding of their textures and finishes. Moreover, physical color cards are not dependent on electricity or internet access, making them a reliable resource in any setting. They also serve as a long-term reference tool, as opposed to digital tools that can be updated or become unavailable. For serious embroiderers, a physical color card collection is a valuable investment, ensuring color consistency and accuracy across multiple projects. It also aids in selecting the most appropriate thread for a particular design. Furthermore, a physical card collection can be a beneficial tool for color matching to other materials, ensuring a cohesive look to the project. By providing a true representation of the actual thread colors, physical color cards are an indispensable part of every embroiderer’s toolkit.

Accessing PDF Conversion Charts

Accessing PDF conversion charts for Madeira embroidery threads is a straightforward process, offering embroiderers a convenient way to manage their thread selection. These charts are typically available for download from various embroidery supply websites and manufacturer’s official pages. The PDF format ensures that the charts can be easily viewed and printed on a variety of devices without losing formatting integrity. Many websites provide direct links to these files, often categorized by the type of conversion, such as Rayon to Polyester or vice versa. Downloading these charts allows for offline access, making them useful in any setting, even without an internet connection. They can be saved to computers, tablets, or smartphones, offering flexibility and ease of use. The PDF format also supports high-resolution printing, which is essential for accurately displaying the color information. Additionally, some charts may include additional information, such as thread weights or suggested uses. Accessing PDF conversion charts simplifies the process of cross-referencing thread colors across brands, allowing for consistent and accurate color matching, ultimately enhancing the quality of embroidery projects. The ability to quickly download and print these charts make them a vital resource for every embroidery enthusiast.

Limitations of Conversion Charts

While Madeira embroidery thread conversion charts are incredibly helpful, it’s crucial to recognize their limitations. These charts are primarily designed to provide the closest possible match between different thread brands, but they cannot guarantee a perfect color replication. Variations in dye lots, manufacturing processes, and the inherent properties of different thread materials can lead to slight discrepancies. For instance, a Rayon thread might appear slightly different in shade compared to its Polyester equivalent, even if the conversion chart indicates they are the same. Additionally, the accuracy of a conversion can be affected by the color calibration of the device displaying the chart, as screen settings can alter the perceived color. Furthermore, some older or less common thread brands might not be included in comprehensive conversion charts, limiting their applicability in such cases. Online conversion tools also have their limitations; they rely on algorithms that are based on average color comparisons and may not always accurately represent the true color match. Therefore, it is always recommended to test the converted thread on a small sample of your fabric before starting a large embroidery project. Physical color cards remain the most reliable way to ensure color accuracy, despite the convenience of PDF charts.

stall converter manual transmission

Stall Converter and Manual Transmission: An Overview

This explores the relationship between stall converters, typically associated with automatic transmissions, and manual transmissions. It examines how these components manage engine power delivery, contrasting their functionalities and exploring unconventional combinations, such as historical fluid drive systems.

Understanding Stall Converters

Stall converters are crucial components in automatic transmissions, managing power transfer from the engine to the transmission. Stall speed refers to the engine RPM at which the torque converter begins to effectively transmit power, enabling the vehicle to move. Unlike a clutch in manual transmissions, a stall converter allows the engine to keep rotating even when the vehicle is stopped.

The “stall” occurs when the brakes are applied while the engine is revving, preventing movement until a specific RPM, such as 2,500 RPM, is reached, overcoming the braking force and initiating wheel spin, much like a clutch slip in manual systems.

Torque Converters in Automatic vs. Manual Transmissions

This section contrasts torque converters in automatics with the role of the clutch in manual transmissions. It highlights how each system allows the engine to run independently of the drivetrain.

The Role of a Clutch in Manual Transmissions

In manual transmissions, the clutch is essential for disconnecting the engine from the transmission. This disengagement allows the driver to shift gears smoothly and prevents the engine from stalling when the vehicle comes to a stop. When the clutch pedal is pressed, it separates the engine from the transmission, interrupting power flow. Releasing the pedal gradually re-establishes the connection, transferring power and enabling the car to move. This contrasts with automatics, which use a torque converter for a similar function, but without direct driver control over engagement. The clutch provides a direct mechanical link.

Torque Converter Function in Automatics

In automatic transmissions, the torque converter serves as a fluid coupling between the engine and transmission. It allows the engine to continue running even when the wheels are stopped, preventing stalling. Unlike a clutch, the torque converter transmits power through fluid motion, providing a smoother, albeit less direct, connection. It consists of an impeller, turbine, and stator, using hydraulic force to multiply torque at lower speeds. This fluid coupling absorbs driveline shock, contributing to comfortable driving. However, it can also consume horsepower compared to the direct mechanical link of a manual transmission clutch.

Stall Speed: Definition and Importance

Stall speed is the RPM at which a torque converter allows an engine to begin rotating transmission gears. It’s vital for optimizing launch performance, affecting how powerfully a vehicle accelerates from a standstill.

Defining Stall Speed

Stall speed, in the context of torque converters, represents the engine RPM at which the converter begins to effectively transfer power to the transmission. It’s often likened to the clutch engagement point in a manual transmission vehicle. Imagine holding the brake and applying the gas; the RPM at which the tires would break loose indicates the approximate stall speed. This critical value dictates how quickly the engine reaches its power band during launch, impacting acceleration performance. A higher stall speed allows the engine to rev higher before fully engaging the transmission.

Factors Influencing Stall Speed Selection

Selecting the appropriate stall speed for a torque converter involves considering several key factors to optimize performance. Engine characteristics, such as horsepower and torque curves, play a significant role, as the stall speed should align with the engine’s optimal operating range. Vehicle weight and gearing also influence the ideal stall speed. Furthermore, intended usage, like street driving, drag racing, or towing, dictates the necessary stall speed. A higher stall speed enhances launch performance for racing, while a lower stall speed improves fuel efficiency and drivability for street use.

Choosing the Right Stall Speed

Selecting the correct stall speed for your torque converter is crucial for optimal performance. This choice depends on engine specs, vehicle usage, and desired driving characteristics, balancing power and efficiency.

Matching Stall Speed to Engine and Vehicle Specs

Selecting the appropriate stall speed requires careful consideration of engine characteristics like horsepower and torque curves. A stall speed that complements the engine’s power band will optimize acceleration. Vehicle weight, gearing, and tire size also influence the ideal stall speed. Matching these parameters ensures the converter efficiently transfers power from the engine to the transmission, avoiding bogging or excessive slippage. A higher stall speed is beneficial with engines producing peak torque at higher RPMs. Conversely, lower stall speeds suit engines with strong low-end torque, maximizing efficiency and drivability for specific applications.

Considering Vehicle Use (Street, Strip, Towing)

The vehicle’s primary use significantly impacts the optimal stall speed selection. For street driving, a lower stall speed offers smoother launches and better fuel economy. Drag racing benefits from higher stall speeds, allowing the engine to quickly reach its peak power band for maximum acceleration off the line. Towing applications require careful consideration; a stall speed that’s too high can generate excessive heat and reduce towing capacity. A balanced approach is crucial, selecting a stall speed that provides adequate low-end torque for pulling while minimizing heat buildup during sustained towing. The vehicle’s purpose must align with the converter’s characteristics.

High Stall Converters: Advantages and Disadvantages

High stall converters offer performance benefits like improved launch capabilities but also present drawbacks. This section explores these tradeoffs, focusing on the gains in acceleration versus the potential for increased heat and reduced efficiency.

Benefits of Higher Stall Speeds

Higher stall speeds in torque converters offer several performance advantages, particularly in applications where rapid acceleration is desired. Primarily, they allow the engine to quickly reach its peak torque range upon acceleration, leading to quicker launches and improved overall performance. This is especially beneficial for vehicles engaged in drag racing or those needing enhanced low-end power. Additionally, high stall converters can help prevent the engine from bogging down during initial acceleration by keeping the RPMs within the engine’s power band. However, these gains are not without trade-offs, which will be discussed later.

Drawbacks of High Stall Converters

While high stall converters offer performance benefits, they also present several drawbacks that must be considered. One significant issue is increased heat generation within the transmission due to more slippage at lower engine speeds. This necessitates the installation of a transmission cooler to prevent overheating and potential damage. Fuel economy typically suffers as the engine operates less efficiently during normal driving conditions. High stall converters may also lead to a less responsive feel during casual driving, with a noticeable delay between throttle input and vehicle acceleration. Noise and vibration levels can also increase.

Torque Converter with Manual Transmission: Is it Possible?

The concept might seem unconventional, but combining a torque converter with a manual transmission has been explored. Extreme applications might benefit. Historical examples, like Mopar’s Fluid Drive, demonstrate its feasibility.

Exploring the Concept

The question arises: can a torque converter work with a manual transmission? It seems contradictory, as manuals traditionally use clutches. However, the idea isn’t entirely far-fetched. Integrating a torque converter could potentially absorb driveline shock and allow for smoother starts and stops without constant clutch engagement. Imagine a system where the torque converter manages low-speed torque multiplication, while the manual transmission offers driver control over gear selection. While unconventional and potentially power-robbing for road racing, this setup might offer unique benefits in specific applications, especially where driveline protection is paramount, though it definitely sounds weird, it works!

Historical Examples (Fluid Drive)

The Mopar Fluid Drive system serves as a historical example of combining elements of both automatic and manual transmissions. This system, used in Dodge, Chrysler, and Plymouth vehicles, featured a fluid coupling—a predecessor to the modern torque converter—paired with a conventional manual gearbox. The fluid coupling allowed the engine to continue turning even when the vehicle was at a standstill in gear, reducing the need for frequent clutch use. While not a true torque converter, it provided a similar function of damping driveline shock and enabling smoother low-speed operation, representing an early attempt to bridge the gap between manual and automatic transmission technologies.

Essential Upgrades for High Stall Converters

High stall converters generate substantial heat. Therefore, a transmission cooler is a necessity. Monitoring transmission temperature with a gauge is also crucial to prevent damage and ensure optimal performance.

Transmission Cooler Necessity

When employing a high stall converter, a robust transmission cooler becomes not just an upgrade, but an absolute necessity. The increased slippage within the converter, which allows the engine to reach higher RPMs before fully engaging the transmission, generates a significant amount of heat. Without an adequate cooling system, this excessive heat can quickly degrade the transmission fluid, leading to diminished lubrication and ultimately, catastrophic transmission failure. A quality cooler dissipates this heat, maintaining optimal fluid temperature.

Importance of a Transmission Temperature Gauge

Complementary to a transmission cooler, a temperature gauge is crucial when using a high stall converter. It provides real-time insight into the transmission’s operating temperature, allowing you to proactively monitor the effectiveness of your cooling system. By observing temperature trends, you can identify potential issues like a failing cooler or excessive converter slippage before they lead to significant damage. This proactive approach enables timely adjustments to driving habits or mechanical interventions, preventing costly repairs and extending the transmission’s lifespan.

Stall Converter Maintenance and Troubleshooting

Proper maintenance is key to maximizing the lifespan of your stall converter. This section will cover essential maintenance practices, potential issues, and practical troubleshooting tips to keep your transmission running smoothly.

Monitoring Transmission Temperature

Maintaining a close watch on your transmission temperature is crucial when using a stall converter. High stall converters generate more heat, potentially leading to transmission damage. Installing a transmission temperature gauge allows you to proactively monitor operating temperatures;

Look for sudden temperature spikes, indicating potential issues. Regular checks help detect problems early, preventing costly repairs. Consistent overheating could signal the need for a larger transmission cooler or a converter adjustment.

Knowing your normal temperature range ensures you can identify deviations promptly. This proactive approach is vital for preserving your transmission’s health and performance.

Potential Issues and Solutions

High stall converters can present unique challenges. Overheating is a common concern, often addressed with a larger transmission cooler. Slippage, indicated by higher-than-normal RPMs without corresponding acceleration, may require converter replacement.

Vibration can also occur if the converter isn’t properly balanced. Ensure correct installation to prevent driveline imbalances. Fluid leaks should be promptly addressed to maintain proper lubrication.

Stalling issues might indicate incorrect stall speed selection for your engine or vehicle. Consult with experts to ensure proper matching. Regular maintenance and prompt attention to these issues can extend the life of your transmission.

media wawa pdf

The SEPTA Media/Wawa Line is a Regional Rail service connecting Center City Philadelphia to Wawa in Delaware County. It serves 14 commuter rail stops, offering frequent service to commuters in the region, departing from Temple University and ending at Wawa.

The Media/Wawa Line is a vital SEPTA Regional Rail service extending from Center City Philadelphia westward to Wawa, Delaware County. Operating on the West Chester Branch, it diverges from the SEPTA Main Line at 30th Street Station, providing crucial commuter access. This line serves numerous communities, linking them to urban centers. The Media/Wawa Line facilitates daily commutes and regional travel with frequent service and strategic station locations. It is a key component of SEPTA’s rail network, enhancing connectivity and accessibility for residents of the Philadelphia metropolitan area. Commuters utilize the Media/Wawa Line for work, leisure, and other essential travel needs. This service is an integral part of the region’s transportation infrastructure, offering a reliable and efficient means of navigating the area.

SEPTA Media/Wawa Line Overview

Service Description

Route Origin and Destination

The SEPTA Media/Wawa Line’s route begins at Temple University, offering service to commuters in the Philadelphia area. From there, it traverses westward, ultimately reaching its destination at Wawa in Delaware County. This route serves as a crucial link connecting urban centers with suburban communities, facilitating daily commutes and regional travel. The Media/Wawa Line provides access to various destinations along its path, catering to diverse travel needs. Its strategic alignment enhances connectivity for residents and businesses, supporting economic activity and regional development. The line’s origin and destination points are significant transportation hubs, contributing to the overall efficiency of SEPTA’s rail network. This service is an integral part of the region’s transportation infrastructure.

Stations Along the Media/Wawa Line

The Media/Wawa Line features 14 stations, connecting Philadelphia to Delaware County. These stops provide access to various communities and destinations, facilitating convenient travel for commuters along the West Chester Branch.

Media Station Details

Media Station, situated in Upper Providence Township, Delaware County, is a key stop on the Media/Wawa Line, located near the town of Media. Serving as a vital transportation hub, it connects commuters to Center City Philadelphia and points west along the former Pennsylvania Railroad’s West Chester Line.

The station, found at 301 Media Station Road (Orange Street and Station Road), offers convenient access for passengers. A 231-space parking lot is available, catering to those who drive to the station. Furthermore, the station’s location allows easy access to downtown Media, with Trolley Route 101 providing a direct connection to the town center. Bus Routes 110 and 118 also serve the area, enhancing connectivity for commuters.

Media Station facilitates seamless travel for residents and visitors;

Wawa Station Details

Wawa Station, a crucial point on the Media/Wawa Line, is located adjacent to U.S. Route 1 in Middletown Township, Delaware County, Pennsylvania. It serves as the western terminus of the line, providing a vital link for commuters traveling to and from the Philadelphia metropolitan area.

Originally built by the West Chester and Philadelphia Railroad, the station later became part of the Pennsylvania Railroad’s West Chester Branch. Over time, it transitioned into SEPTA’s R3 line and was subsequently renamed the Media/Elwyn Line, then finally, the Media/Wawa Line. Today, Wawa Station stands as a modern commuter rail facility, offering convenient access for residents and visitors in the surrounding communities.

Bus routes 111 and 114 stop at Wawa station.

The Media/Wawa Line provides a detailed schedule for commuters. You can find specific commuter rail times for each stop to help plan your travel accordingly. Check for updated schedules online.

Commuter Rail Times

The SEPTA Media/Wawa Line offers a comprehensive commuter rail schedule for its 14 stops between Temple University and Wawa. Passengers can find detailed timetables outlining departure and arrival times at each station, ensuring efficient trip planning. For example, a train leaving Temple University at 4:10 PM arrives in Wawa at 5:12 PM. Schedules are readily available, allowing commuters to view upcoming train times and frequencies. These resources help passengers stay informed about potential delays, such as those caused by weather conditions, and make necessary adjustments to their travel plans. SEPTA provides updated schedules for the Media/Wawa Line, ensuring riders have the latest information.

Media/Wawa Line Schedule and Timetable

Schedule Availability (PDF)

SEPTA provides the Media/Wawa Line schedule in PDF format for easy access and offline viewing. This downloadable schedule offers a comprehensive overview of train times, station stops, and service frequencies. The PDF documents are regularly updated to reflect any changes in the timetable, ensuring passengers have the most current information. These schedules are essential for commuters planning their journeys, allowing them to check train times and plan connections. The PDF format enables users to save the schedule on their devices for quick reference, even without an internet connection. Availability of the PDF ensures that riders can access the information they need, whenever they need it.

The Media/Wawa Line utilizes the West Chester Branch, a former Pennsylvania Railroad line. Service initially extended to West Chester, PA, but was truncated to Elwyn in 1986, then later restored to Wawa.

West Chester Branch Origins

The West Chester Branch, the foundation of today’s Media/Wawa Line, has roots tracing back to the West Chester and Philadelphia Railroad; Later, the Pennsylvania Railroad (PRR) took over, operating it as the West Chester Line. This route, eventually becoming SEPTA’s R3 line, played a vital role in connecting communities in Delaware County and beyond. The line diverged from the SEPTA Main Line at 30th Street Station, providing access to Philadelphia.

The West Chester Branch served as a crucial artery for both passenger and freight transport. It facilitated economic growth and provided essential transportation links for residents. The line’s historical significance is deeply intertwined with the development of the region. It represents a legacy of rail transport.

History of the Media/Wawa Line

Truncation to Elwyn

Despite its historical importance, the West Chester Branch faced service reductions. On September 19, 1986, service was truncated to Elwyn, marking a significant change. This decision meant that trains no longer continued to West Chester. This change impacted communities further west and altered commuter patterns. The truncation to Elwyn was a turning point in the line’s history.

While the reasons behind the truncation are multifaceted, it reflected evolving transportation priorities. Despite the reduction in service, the Elwyn to Philadelphia segment continued to serve as an important commuter route. The line retained its significance for residents of Delaware County and beyond. The truncation remains a notable event.

Wawa actively engages with its customers through various social media platforms. You can check out Wawa on TikTok, Facebook, Instagram, and X. They share fan favorites, community involvement, and customer photos.

Social Media Channels

Wawa maintains a vibrant presence across various social media platforms to connect with customers and share company updates. Their official accounts on TikTok, Facebook, Instagram, and X (formerly Twitter) showcase fan favorites, community involvement, and user-generated content. By following these channels, customers can stay informed about new product launches, promotional offers, and local events. Wawa’s social media strategy aims to foster a strong sense of community and brand loyalty. They actively encourage customers to share their Wawa experiences by posting photos and videos using specific hashtags. This creates a dynamic online environment where Wawa enthusiasts can connect and engage with the brand. Furthermore, the social media team promptly addresses customer inquiries and feedback, ensuring a positive and responsive online experience. Through consistent and engaging content, Wawa effectively utilizes social media to enhance its brand image and strengthen its relationship with its customer base.

Wawa’s Media Presence

Press Releases and Media Kits

Wawa provides press releases and media kits to keep the public and media informed about company news and events. These resources offer insights into Wawa’s expansion plans, community initiatives, and corporate milestones. Media kits typically include high-resolution images, background information, and key contact details for media inquiries. Wawa’s press releases highlight significant announcements, such as new store openings, partnerships, and charitable contributions. By making these materials readily available, Wawa aims to maintain transparency and build strong relationships with media outlets. The company encourages journalists and bloggers to utilize these resources to accurately report on Wawa’s activities and impact. Access to press releases and media kits allows stakeholders to stay updated on Wawa’s growth and commitment to the communities it serves. These resources provide a comprehensive overview of Wawa’s corporate identity and its dedication to delivering quality products and services.

Media, PA, offers various transportation options, including SEPTA’s Trolley Route 101. This trolley runs along State Street, providing convenient access to the town center and connecting to other regional transit services.

Trolley Route 101

SEPTA’s Trolley Route 101 is a vital transportation link in Media, Pennsylvania, offering convenient service along State Street. The trolley route provides easy access to the heart of Media, making stops at major corners and key locations within the town. It connects Media to other parts of the region, enhancing transportation options for residents and visitors alike.

The Route 101 trolley line is an integral part of Media’s public transportation network, complementing the Media/Wawa Line regional rail service. Passengers can seamlessly transfer between the trolley and the rail line, expanding their travel possibilities within Delaware County and beyond. The trolley’s frequent service and strategic stops make it a popular choice for navigating Media and accessing its various amenities. This allows easy transfers between the rail line and the trolley.

Transportation Options in Media, PA

Bus Routes 110 and 118

In addition to the Media/Wawa Line and Trolley Route 101, Media, PA, is served by SEPTA bus routes 110 and 118, enhancing transportation options within the town and connecting it to surrounding areas. These bus routes provide convenient access to various destinations in Media, complementing the rail and trolley services. Bus Routes 110 and 118 are important components of Media’s public transportation network, offering comprehensive coverage and accessibility for residents and visitors.

These bus routes make stops throughout the town, ensuring that key locations and residential areas are easily accessible. Together, these routes provide a well-rounded transportation system, connecting Media to neighboring communities and facilitating convenient travel for all. These buses work with Route 101, and the Media/Wawa line to provide travel options.

aa promises pdf

What are the AA Promises?

The AA Promises are a set of benefits from embracing sobriety and the 12-step program, offering hope and motivation. They are found within the Big Book of Alcoholics Anonymous and provide a vision for personal growth.

Origin of the AA Promises in the Big Book

The AA Promises are deeply rooted in the foundational text of Alcoholics Anonymous, known as the Big Book. While not presented as a formal, numbered list, the essence of these promises is woven throughout its pages, particularly in Chapter 6, “Into Action.” This chapter outlines the anticipated outcomes for those diligently working through the Twelve Steps.

Many AA members consider a specific passage within this chapter as the core of the AA Promises, highlighting the transformative changes experienced through commitment to the program. These promises are not guarantees but rather potential realities that materialize with dedication and consistent effort, shaping a new outlook on life.

The Nature of AA Promises

The AA Promises aren’t explicit guarantees but rather potential outcomes stemming from dedicated engagement with the Twelve Steps. They represent a shift in perspective, offering hope and a newfound sense of purpose for individuals seeking recovery. The promises address both the elimination of negativity associated with alcoholism and the development of a spiritual foundation.

These promises highlight emotional stability, spiritual growth, and freedom from obsession, guiding individuals toward a more fulfilling life. They materialize over time through continuous effort and commitment. The promises serve as a roadmap for personal betterment and symbolize the potential for positive change. Each person’s journey and experience is unique.

Understanding the 12 Promises

The 12 Promises offer a vision of emotional and spiritual changes during recovery. They showcase the goodness arising from working the Steps and provide hope for positive transformation.

Specific Promises related to each of the 12 Steps

Within the Alcoholics Anonymous framework, the 12 Steps are intertwined with specific promises, offering tangible rewards for diligent effort. These promises aren’t always explicitly stated, but are implied outcomes of working each step. For example, overcoming fear and insecurity is promised as progress is made. Intuitively handling baffling situations becomes possible. The realization that a higher power is acting in one’s life emerges.

These promises are not mere wishful thinking; they are being fulfilled, sometimes quickly, sometimes slowly, among those who actively work the program. Each step unlocks unique benefits, driving personal growth and sustained sobriety. They materialize if we work for them.

The Promises as a Source of Hope and Motivation

The AA Promises serve as a beacon of hope, offering a glimpse of the positive changes awaiting those who commit to recovery. They counteract the despair often associated with addiction by illustrating the potential for a fulfilling, sober life. By visualizing these promises, individuals find the motivation to persevere through challenging times in the 12-step program.

These promises are not just abstract concepts; they represent real, achievable outcomes. Experiencing the initial fulfillment of these promises reinforces belief in the program. This fuels continued dedication. The promises offer structure and goals, fostering optimism and resilience on the recovery journey, to keep going.

The AA Promises: Detailed Examination

The AA Promises are a set of statements outlining the benefits of sober living and following AA principles. They offer profound emotional and spiritual changes throughout recovery, as noted in the Big Book.

Promise of New Freedom and Happiness

This promise speaks to a transformation from the constraints of addiction to a life filled with joy and liberation. It’s a shift from the bondage of alcohol to the freedom of choice and self-control. Individuals often find that sobriety unlocks new passions, interests, and opportunities they never thought possible. This newfound happiness isn’t just fleeting; it’s a deep-seated sense of contentment that comes from living authentically and in alignment with one’s values.

The promise is an enticement to those who want a fulfilling life. The joy is not just a feeling but a foundational element that supports long-term recovery and well-being. It’s a testament to the transformative power of the AA program.

Promise of No Regret for the Past

This AA promise acknowledges the harm caused by alcohol addiction, offering solace by suggesting freedom from the burden of past actions. This promise is powerful, as living with regret can be detrimental to recovery. The AA program provides tools and strategies for making amends and moving forward. While it doesn’t erase the past, it reframes it as a learning experience.

The goal is to accept what has happened, learn from it, and use it to fuel a positive future. The focus shifts from dwelling on mistakes to building a life of purpose and integrity. This transformation allows for a profound sense of self-forgiveness and acceptance that is vital for long-term sobriety and emotional healing.

Promise of Changed Attitude Towards Life

One of the most profound promises of AA is a complete shift in one’s outlook. This goes beyond simply stopping drinking; it involves a fundamental change in how one perceives and interacts with the world. This transformation includes increased gratitude, peace of mind, and a newfound ability to face life’s challenges with resilience.

Self-seeking behaviors diminish, replaced by a genuine interest in helping others. Fear of people and insecurity fade, replaced by intuition and confidence. Participants develop a spiritual foundation and a new perspective. This promise highlights that recovery is not just about sobriety; it’s about a richer, more meaningful existence.

Achieving the AA Promises

Achieving the AA Promises requires dedication to working the twelve steps, often with a sponsor. Commitment and consistent effort are crucial for experiencing the transformative benefits outlined in the promises.

Working the Steps with a Sponsor

Working the twelve steps with a sponsor is a cornerstone of achieving the AA Promises. A sponsor provides guidance, support, and accountability throughout the recovery journey. They offer insights based on their own experiences and help navigate the challenges of each step. The sponsor-sponsee relationship fosters a deeper understanding of the program’s principles.

Sponsors assist in self-reflection, encouraging honest self-assessment and identification of personal shortcomings. They also guide sponsees in making amends and developing healthier coping mechanisms. Working with a sponsor instills confidence, promotes spiritual growth, and increases the likelihood of realizing the full potential of the AA Promises. The relationship provides a safe and supportive environment.

The Importance of Commitment and Effort

Achieving the AA Promises necessitates a strong commitment to the recovery process and dedicated effort. It’s not a passive endeavor but an active pursuit of personal transformation. Success requires consistent attendance at meetings, honest self-reflection, and willingness to make amends. Overcoming ingrained habits and patterns demands perseverance.

The journey involves facing uncomfortable truths and embracing new behaviors, which requires continuous dedication. Slacking off can hinder progress and diminish the likelihood of realizing the promises. Commitment means prioritizing sobriety and actively engaging in the 12-step program. It entails embracing the principles, seeking guidance, and maintaining a proactive approach to recovery. Effort yields the rewards.

Benefits of the AA Promises

The AA Promises offer improved psychological well-being and a spiritual foundation. They represent a transformative journey towards a new outlook on life, fostering gratitude and a more fulfilling existence.

Improved Psychological Well-being

Working the Twelve Steps can lead to a significant improvement in one’s psychological well-being, promoting a sense of peace and gratitude. The AA promises provide a pathway away from the negativity associated with alcoholism, replacing it with a more fulfilling life; By confronting past mistakes and developing healthier coping mechanisms, individuals experience emotional stability. The promises also foster resilience, enabling members to navigate daily challenges with greater confidence. Overcoming fear and insecurity contributes to enhanced mental health, allowing for a more positive outlook. This newfound psychological strength empowers individuals to build stronger relationships and engage in life with renewed purpose. The emphasis on self-reflection and personal growth promotes lasting positive change.

Spiritual Foundation and New Outlook on Life

The AA promises provide a spiritual foundation and a new outlook on life for those in recovery from alcoholism. They address the dread and negativity associated with addiction, replacing it with hope and purpose. Through working the program, individuals gain a deeper understanding of themselves and their place in the world. This leads to a shift in perspective, allowing them to see life’s challenges and opportunities in a new light. A connection to something greater than themselves fosters inner peace and resilience. The promises inspire a commitment to personal growth, promoting a journey of self-discovery and spiritual awakening. This transformative process cultivates gratitude and a newfound appreciation for life’s blessings, fostering lasting change.

Resources for Information and Support

The Big Book of Alcoholics Anonymous provides comprehensive insights into the program and promises. SAMHSA’s National Helpline offers confidential support and treatment referrals for substance use disorders, available 24/7.

The Big Book of Alcoholics Anonymous

The Big Book serves as a foundational resource, detailing the experiences of early AA members and outlining the 12-step program. It contains the original articulation of the AA promises, though not in a formal list. Chapter 6, “Into Action,” is a key section where these promises are implied, offering hope and a vision for recovery. The book emphasizes a spiritual awakening and a changed outlook on life as a result of working the steps. It provides guidance, shared experiences, and a framework for understanding alcoholism and achieving sobriety. The Big Book is accessible through AA meetings, online resources, and libraries, serving as a constant companion and source of inspiration for those seeking recovery. It offers a pathway to a new life free from the grips of alcohol addiction.

SAMHSA’s National Helpline

SAMHSA’s National Helpline provides a crucial resource for individuals and families facing mental health and substance use disorders. It is a free, confidential, and accessible 24/7, 365-day-a-year treatment referral and information service, available in both English and Spanish. This helpline can assist in locating treatment facilities, support groups, and community-based organizations. While not specifically focused on the AA promises, it serves as a vital entry point for those seeking help for alcohol addiction and related issues. By connecting individuals with appropriate resources, SAMHSA’s helpline supports the initial steps toward recovery and the possibility of experiencing the transformative benefits outlined in the AA promises. It is a valuable tool for finding immediate support and guidance.

haydn trumpet concerto pdf

Haydn Trumpet Concerto: An Overview

Franz Joseph Haydn’s Trumpet Concerto in E-flat major stands as a cornerstone of the trumpet repertoire. Composed in 1796, it showcases the capabilities of the newly invented valve trumpet. Its enduring popularity stems from its melodic beauty, technical demands, and historical significance. The concerto remains a staple for both performers and audiences.

Historical Context of the Concerto

The late 18th century witnessed significant advancements in musical instrument technology, setting the stage for Haydn’s groundbreaking Trumpet Concerto. Prior to the invention of the valve trumpet, the instrument was largely restricted to playing notes within the harmonic series, limiting its melodic capabilities. Haydn’s long-time friend, the trumpet virtuoso Anton Weidinger, pioneered the development of a keyed trumpet, which allowed for chromatic notes and expanded the instrument’s expressive range.

Haydn composed the concerto in 1796, specifically for Weidinger and his innovative instrument. This collaboration marked a pivotal moment, pushing the boundaries of trumpet playing and paving the way for future composers to explore the instrument’s potential. The concerto reflects the Classical era’s emphasis on clarity, balance, and melodic elegance, while also incorporating elements of virtuosity to showcase the capabilities of the new valve trumpet.

The political and social climate of the time also played a role in the concerto’s creation. Europe was in turmoil due to the French Revolution, and Haydn, serving as Kapellmeister to the Esterházy family, found solace and inspiration in his music. The Trumpet Concerto, with its optimistic and celebratory character, served as a testament to the enduring power of art amidst turbulent times. Its premiere was a significant event, introducing audiences to the revolutionary sound of the valve trumpet and solidifying Haydn’s reputation as a musical innovator.

The Revolutionary Valve Trumpet

The Haydn Trumpet Concerto owes its existence and unique character to the revolutionary valve trumpet, an instrument that dramatically expanded the trumpet’s capabilities. Before the advent of valves, trumpets were primarily limited to playing notes within their overtone series, making chromatic passages and complex melodies impossible.

Anton Weidinger’s keyed trumpet, while not a true valve instrument, represented a significant step forward. It employed a system of keys that allowed the player to alter the length of the instrument’s tubing, effectively filling in the gaps between the natural notes. This innovation enabled the performance of fully chromatic melodies, opening up new possibilities for composers and performers alike.

Haydn, recognizing the potential of Weidinger’s invention, crafted a concerto that exploited its newfound capabilities. The concerto’s melodic lines, which frequently venture outside the traditional harmonic series, would have been unplayable on a natural trumpet. The work showcases the instrument’s ability to execute rapid passages, lyrical melodies, and expressive ornamentation, all of which were previously unattainable.

While Weidinger’s keyed trumpet was eventually superseded by the modern valve trumpet, its significance in the development of the instrument cannot be overstated. It paved the way for future innovations and inspired composers to write music that fully utilized the trumpet’s potential, forever changing the landscape of brass music.

Availability of Sheet Music

The Haydn Trumpet Concerto is widely available in various formats. Musicians can find sheet music through free PDF downloads, offering accessible options. Alternatively, numerous sheet music retailers provide professionally printed editions and arrangements for different skill levels and instrumentations.

Free PDF Downloads: Where to Find Them

For musicians seeking accessible and cost-effective resources, free PDF downloads of the Haydn Trumpet Concerto are readily available online. Several websites offer these downloads, catering to various needs, from solo trumpet parts to piano reductions and full orchestral scores. Platforms like IMSLP (International Music Score Library Project) often host public domain scores, including the Haydn concerto.

Websites dedicated to trumpet resources may also provide free sheet music. When searching for free PDF downloads, it’s essential to ensure the quality and accuracy of the source. Look for reputable sites that offer well-formatted and legible scores. Some versions may include edits or arrangements, so carefully review the PDF before using it for performance.

Be aware that some free downloads may be scans of older editions, potentially containing errors or inconsistencies. Comparing multiple versions can help identify and correct any discrepancies. Additionally, consider supporting music publishers by purchasing official editions if possible, especially for performance purposes. Free PDFs offer a valuable starting point for study and practice.

Remember always to respect copyright laws and use free downloads responsibly. By utilizing these resources wisely, musicians can access the Haydn Trumpet Concerto without financial barriers, fostering wider appreciation and performance of this iconic work.

Sheet Music Retailers: Options and Editions

For musicians seeking high-quality, professionally edited sheet music of the Haydn Trumpet Concerto, numerous reputable retailers offer a variety of options and editions. These retailers provide access to both physical copies and digital downloads, catering to diverse preferences. Sheet Music Plus, J.W. Pepper, and Amazon are popular choices, offering a wide selection of editions for solo trumpet, trumpet and piano reduction, and full orchestral scores.

When choosing an edition, consider factors such as the editor, publisher, and included features. Some editions may include performance notes, historical context, or alternative cadenzas. Look for editions that are clearly printed, well-formatted, and accurate. Boosey & Hawkes is a respected publisher known for its reliable editions of classical works, including the Haydn concerto.

Retailers often offer different arrangements to suit various skill levels and performance settings. Transposed versions for C trumpet are available, as well as editions for trumpet and brass quintet. Prices vary depending on the edition and format, so compare options before making a purchase. Digital downloads provide immediate access, while physical copies offer the convenience of a printed score.

Consult reviews and recommendations from other musicians to help inform your decision. Investing in a high-quality edition ensures an accurate and enjoyable performance experience. Remember to check the retailer’s return policy in case the sheet music does not meet your expectations.

Analysis of the Concerto

Haydn’s Trumpet Concerto is a study in classical form and innovative trumpet writing. Examining the key relationships, structural elements of each movement, and technical demands placed on the soloist reveals the concerto’s genius. It is a cornerstone of trumpet repertoire.

Key and Structure of the Movements

The Haydn Trumpet Concerto is composed in three movements, each exhibiting distinct characteristics in terms of key, tempo, and form. The first movement, Allegro, is in E-flat major and follows a sonata form structure. It presents a lively and engaging theme, immediately establishing the bright and optimistic character of the concerto. The exposition introduces the primary and secondary themes, which are then developed in the central section before being recapitulated.

The second movement, Andante, shifts to A-flat major, offering a contrasting lyrical and introspective mood. This movement is characterized by its beautiful melody and showcases the trumpet’s expressive capabilities. It typically adheres to a ternary form (ABA), with a contrasting middle section providing a brief departure from the main theme before returning to the opening melody.

The third movement, Allegro, returns to the tonic key of E-flat major and adopts a rondo form. This movement is energetic and playful, featuring a recurring main theme interspersed with contrasting episodes. The rondo structure provides a sense of unity and coherence while allowing for digressions and variations. The concerto concludes with a brilliant and triumphant finale, solidifying its place as a masterpiece of the trumpet repertoire.

Technical Challenges for the Trumpeter

The Haydn Trumpet Concerto, while celebrated for its melodic charm, presents significant technical challenges for the trumpeter. The concerto demands a high level of control, agility, and endurance. Accurate articulation is crucial, especially in the fast-paced passages of the outer movements. The trumpeter must execute clean and precise tonguing while maintaining a consistent tone throughout the range.

The high register of the solo part requires a strong embouchure and well-developed breath control. Maintaining intonation in the upper register is particularly challenging, demanding careful attention to pitch and precise lip control. The concerto features rapid scalar passages and arpeggios, which require exceptional finger dexterity and coordination. The trumpeter must navigate these passages with accuracy and fluidity, ensuring that each note is clear and distinct.

The lyrical second movement demands expressive phrasing and control of dynamics. The trumpeter must shape the melodic lines with nuance and sensitivity, conveying the emotional depth of the music. The ability to sustain long phrases and execute smooth legato passages is essential for a successful performance. Overall, the concerto requires a combination of technical prowess and musical artistry.

Notable Performances and Recordings

The Haydn Trumpet Concerto has inspired countless performances. It has been recorded by numerous renowned trumpeters. These recordings showcase diverse interpretations. They highlight the concerto’s enduring appeal. Each artist brings a unique perspective. They contribute to the rich performance history.

Influence and Legacy

Haydn’s Trumpet Concerto holds a monumental position. It is a pivotal work in the trumpet repertoire. Its influence extends far beyond its initial creation. It has inspired generations of trumpeters. Composers found inspiration in Haydn’s innovative use of the instrument. The concerto helped solidify the trumpet’s role. It established the trumpet as a prominent solo instrument.

The work’s melodic charm and technical brilliance are equally important. These aspects contribute to its enduring appeal. It remains a favorite among performers and audiences alike. It is a testament to Haydn’s genius. His contributions to classical music are undeniable. Haydn’s concerto bridged the gap. It connected the Baroque era with the emerging Romantic period. It continues to be a standard audition piece. It is an essential component of every serious trumpeter’s education.

Furthermore, the concerto’s accessibility has broadened its impact. Numerous arrangements and transcriptions exist. These versions cater to various skill levels. They ensure that aspiring musicians can engage with this masterpiece. The availability of sheet music, both free and for purchase, further democratizes access. This makes it possible for students and professionals to learn and perform the concerto. Haydn’s legacy lives on through every performance. It lives on through every new recording.

real estate award pay guide

Understanding real estate agent compensation is vital for both agents and clients. This guide explores commission structures, negotiation, and recent changes impacting agent earnings, providing insights into fair pay practices and market trends that effect 2025’s awards.

Understanding Real Estate Agent Commissions

Real estate agent commissions are the cornerstone of how agents are compensated for their expertise in facilitating property transactions. Typically, these commissions are calculated as a percentage of the final selling price, usually ranging from 5% to 6%, though this is always negotiable. This compensation covers a wide array of services, including marketing the property, conducting showings, negotiating offers, and guiding clients through the complex closing process. The commission is generally paid by the seller and then split between the seller’s agent (listing agent) and the buyer’s agent, fostering cooperation within the real estate ecosystem. Understanding this commission structure is crucial for both buyers and sellers. For sellers, it represents a significant cost of selling, while for buyers, it indirectly influences the level of service and representation they receive. Recent changes in the industry emphasize transparency in commission discussions, ensuring that clients are fully aware of how their agents are compensated. Discount brokers are emerging, offering lower rates or flat fees, altering traditional commission dynamics. As of August 2024, new rules are being implemented to provide greater clarity and flexibility in commission arrangements, aiming to promote competition and fairness within the market. This understanding empowers everyone to make informed decisions.

Typical Commission Structure

The typical real estate commission structure revolves around a percentage of the property’s final sale price, traditionally falling within the 5% to 6% range. This total commission is generally split between the listing agent, who represents the seller, and the buyer’s agent, who represents the buyer. The split is often 50/50, but this can vary based on agreements between the agents and their respective brokerages. For example, on a $500,000 home sale with a 6% commission, the total commission would be $30,000. If split evenly, each agent would receive $15,000 before any splits with their brokerage.
Brokerage splits can range widely, with traditional models often seeing agents receiving between 50% to 80% of their commission, while the brokerage retains the remainder to cover operational costs, marketing support, and other resources.
100% commission models exist, where agents keep the entire commission but typically pay a desk fee or monthly charge to the brokerage. Tiered commission structures are also used, where agents earn a higher percentage as their sales volume increases. Understanding these structures is essential for both agents and clients to navigate real estate transactions effectively and ensure fair compensation for services rendered.

Factors Influencing Commission Rates

Several factors influence real estate commission rates, impacting both agents’ earnings and overall transaction costs. Market conditions play a significant role; in competitive markets with high demand, commission rates might be more negotiable due to increased sales volume. Conversely, in slower markets, agents may be less willing to lower their rates as they need to compensate for fewer transactions.
The level of service provided also influences rates. Agents offering premium services, such as extensive marketing, professional staging, or specialized expertise, may justify higher commissions. Property value is another crucial factor; commissions on higher-priced homes typically generate larger fees, potentially leading to more negotiation.
Geographic location matters, with commission rates varying across different regions and even within cities. Agent experience and reputation can also affect rates; seasoned agents with a proven track record may command higher commissions.
Finally, brokerage policies influence the commission split between the agent and the brokerage, which can impact the agent’s willingness to negotiate with clients. Understanding these factors helps both buyers and sellers make informed decisions and negotiate effectively.

Negotiation Strategies for Commissions

Negotiating real estate commissions effectively requires understanding market dynamics and employing strategic communication. Sellers can research average commission rates in their area to establish a baseline. Highlighting comparable sales data can support their position for a lower rate. It’s beneficial to emphasize the property’s unique selling points, which might streamline the agent’s work and justify reduced fees.
Buyers can also negotiate, particularly when working with a buyer’s agent. Discussing the agent’s experience, services offered, and potential commission rebates can lead to favorable terms. Exploring alternative fee structures, such as flat fees or hourly rates, might be beneficial.
Transparency is crucial. Clearly communicate expectations and concerns regarding commission rates. Consider offering incentives, such as a bonus for a quick sale above the asking price, in exchange for a lower commission.
Building rapport with the agent and demonstrating a willingness to collaborate can create a more positive negotiation environment. Remember, the goal is to reach a mutually agreeable arrangement that compensates the agent fairly while aligning with your financial objectives. Always get the agreed-upon terms in writing.

Traditional Broker/Agent Commission Split

The traditional commission split model in real estate involves dividing the total commission earned from a sale between the brokerage and the agent. Typically, the commission is split between the listing broker and the selling broker, and then each broker splits their portion with the agent representing their side of the transaction.
The exact split percentage varies widely based on factors such as the agent’s experience, sales volume, and the brokerage’s policies. A common split for newer agents might be 50/50, where the agent receives 50% of the commission and the brokerage retains the other 50%. More experienced or high-performing agents may negotiate a higher split, such as 60/40, 70/30, or even higher.
The brokerage provides resources like office space, marketing support, administrative assistance, and training, justifying their share. This model fosters a supportive environment and shared responsibility. However, agents may feel limited by the split, especially when generating significant revenue. Understanding this structure is crucial for both agents and brokers to ensure fair compensation and a sustainable business relationship. Clear agreements outlining the split are essential.

100% Commission Split Model

The 100% commission split model in real estate represents a distinct departure from the traditional structure. In this model, agents retain the entire commission earned from their sales, offering a potentially more lucrative arrangement. However, this comes with the understanding that agents are responsible for covering their own expenses, such as marketing, office fees, and other business-related costs.
Brokerages offering a 100% commission split typically charge agents a desk fee, a monthly fee, or a transaction fee to cover their overhead. This model appeals to experienced, self-sufficient agents who have a strong client base and a proven track record. These agents often value the autonomy and control over their earnings that this model provides.
While the potential for higher income is attractive, agents must carefully evaluate their expenses and ensure they can manage their finances effectively. The 100% commission model requires a high degree of self-discipline and business acumen. It’s essential for agents to weigh the benefits of keeping the entire commission against the costs of self-funding their operations.

Referral Fees: Brokerage to Brokerage and Agent Split

Referral fees in real estate are payments made for connecting a client with another agent or brokerage. These fees typically arise when an agent cannot personally assist a client, perhaps due to geographical limitations or specialization differences. Referral fees are often a percentage of the commission earned by the agent who ultimately closes the deal with the referred client.
When a referral occurs between brokerages, the referring brokerage receives a fee from the brokerage that successfully represents the client. The referring brokerage may then split a portion of this fee with the agent who initiated the referral.
Similarly, within a brokerage, an agent who refers a client to another agent may receive a referral fee. The specific split between the brokerage and the referring agent varies depending on the agreement. Referral fees offer a way for agents to generate income even when they cannot directly handle a transaction. It’s a common practice that fosters collaboration within the real estate industry.

Percentage Paid to Real Estate Franchise

Real estate franchises offer agents brand recognition, marketing support, and established systems. In exchange, agents affiliated with a franchise typically pay a percentage of their commissions to the franchise. This percentage varies widely depending on the franchise agreement. It can cover various services like training, technology, and advertising.
Franchise fees often include an initial startup cost, ongoing royalty payments (a percentage of each commission), and marketing contributions. These costs can impact an agent’s overall earnings, especially early in their career. Some franchises offer tiered commission structures, where the percentage paid decreases as the agent’s sales volume increases.
Agents must carefully evaluate the benefits and costs of joining a franchise. The brand recognition and support can attract clients and boost sales. However, agents should compare the franchise fees to the potential increase in income to determine if it’s financially advantageous. Understanding the commission structure of different franchises is crucial for agents making career decisions.

Impact of Commission Structures on Agent Motivation

Real estate commission structures significantly influence agent motivation and performance. A well-designed commission plan can drive sales, increase client satisfaction, and foster agent loyalty. Conversely, a poorly structured plan can lead to decreased motivation and high agent turnover.
Traditional commission splits, where agents share a percentage of their earnings with the brokerage, can motivate agents to close deals. However, some agents may find the split unfair, especially high-performing ones. The 100% commission model, where agents keep all their commissions but pay desk fees, attracts self-motivated agents who value autonomy.
Tiered commission structures, which increase the commission rate as agents reach certain sales goals, can incentivize higher performance. Bonuses and incentives for exceeding targets further boost motivation.

To optimize agent motivation, brokerages should communicate commission structures transparently, offer opportunities for professional development, and recognize agent achievements. A supportive and rewarding environment, combined with a fair commission plan, can lead to a highly motivated and successful team of real estate agents.

Recent Changes in Real Estate Commission Structures (August 2024)

Significant shifts occurred in real estate commission structures starting August 2024, impacting agent compensation and industry practices. These changes largely stem from increased scrutiny regarding transparency and potential anti-competitive practices.

The traditional model, where sellers typically paid a percentage of the property’s sale price as commission, has been challenged. New rules emphasize the negotiability of commissions and require clearer communication about fees. The National Association of Realtors (NAR) implemented changes to promote greater transparency in commission discussions.

One major shift involves how buyer agent commissions are communicated. Previously, these commissions were often predetermined by the listing agent. The new rules aim to foster more competition and potentially lower costs for consumers.

These changes encourage agents to articulate their value proposition clearly and negotiate commissions based on the services they provide. Discount brokerages and alternative fee structures are gaining traction as consumers seek more affordable options. The industry is adapting to these changes by focusing on transparency, value-added services, and flexible commission models.

Transparency in Commission Discussions

Transparency is paramount when discussing real estate commissions, ensuring that both agents and clients have a clear understanding of the fees involved and the services provided. Open communication builds trust and fosters a positive working relationship. Agents should clearly outline their commission structure, including the percentage or fixed fee, and explain what services are included in that fee.

Clients should feel comfortable asking questions about the commission and negotiating terms that align with their needs and budget. Transparency also extends to disclosing any potential conflicts of interest or referral fees. Agents should explain how the commission is split between the listing and buyer’s agents, as well as any fees paid to the brokerage or franchise.

Recent changes in real estate commission structures emphasize the importance of transparent discussions. Agents must be prepared to articulate their value proposition and justify their fees based on the services they provide. By prioritizing transparency, agents can build trust with clients and navigate the evolving landscape of real estate commissions.

tokyo hop on hop off bus map pdf

Tokyo Hop-On Hop-Off Bus: A Comprehensive Guide

Explore Tokyo effortlessly with our hop-on hop-off bus guide. Discover routes and key attractions. Download the Tokyo hop-on hop-off bus map PDF for easy navigation. Enjoy the flexibility and convenience of exploring Tokyo at your own pace.

Tokyo’s hop-on hop-off buses offer a fantastic way to explore the city’s iconic landmarks and hidden gems. These buses provide a flexible and convenient transportation option‚ allowing visitors to discover Tokyo at their own pace. With strategically located stops near major attractions‚ passengers can easily hop off to explore points of interest‚ and then hop back on to continue their journey.

The hop-on hop-off concept is ideal for travelers who want to see a lot in a limited amount of time. These buses often feature open-top double-decker designs. This offers panoramic views of the city. Many also provide multilingual audio guides‚ offering insights into Tokyo’s history and culture. A map is available in PDF format for easy access;

Whether you’re interested in exploring ancient temples‚ bustling markets‚ or modern skyscrapers‚ Tokyo’s hop-on hop-off buses provide a comprehensive and enjoyable sightseeing experience. They are a great option for first-time visitors‚ families‚ and anyone looking to maximize their time in this dynamic city. The availability of a downloadable map further enhances the experience‚ allowing for easy planning and navigation.

Benefits of Using a Hop-On Hop-Off Bus in Tokyo

Using a hop-on hop-off bus in Tokyo offers numerous advantages for tourists. Firstly‚ it provides unparalleled flexibility‚ allowing you to create your own itinerary and explore attractions at your own pace. You can hop off at any stop‚ spend as much time as you like‚ and then hop back on to continue your journey. This is particularly beneficial for those with specific interests or time constraints.

Secondly‚ these buses offer a convenient and comfortable way to navigate Tokyo’s vast and complex transportation system. You can avoid the hassle of navigating subway lines and dealing with language barriers. Many buses provide multilingual audio guides‚ offering insightful commentary on the city’s history and culture.

Furthermore‚ hop-on hop-off buses often cover a wide range of popular attractions‚ ensuring that you don’t miss out on any key sights. With a downloadable map in PDF format‚ planning your route and identifying points of interest becomes even easier. By choosing this option‚ tourists maximize their sightseeing experience while minimizing the stress of independent travel.

Available Routes: Red‚ Blue‚ and Green Courses

The Tokyo hop-on hop-off bus system typically features three distinct routes: the Red‚ Blue‚ and Green courses. Each route is designed to showcase different aspects of Tokyo‚ catering to varied interests. The Red Course often includes stops at iconic cultural landmarks like the Tokyo Skytree‚ Asakusa Temple‚ Ueno Park‚ and the vibrant Akihabara district. This route is ideal for those seeking a glimpse into Tokyo’s traditional and modern sides.

The Blue Course‚ on the other hand‚ tends to focus on areas such as Tokyo Tower‚ Tsukiji fish market (outer market)‚ and the upscale Ginza district. This route is perfect for exploring Tokyo’s shopping‚ dining‚ and entertainment offerings. Finally‚ the Green Course may include stops in Shinjuku and Shibuya‚ known for their bustling atmosphere and trendy shops.

Having a Tokyo hop-on hop-off bus map PDF allows riders to visualize these routes‚ pinpoint specific attractions‚ and plan their journey efficiently‚ maximizing their exploration of Tokyo’s diverse neighborhoods.

Detailed Stops on Each Route: Key Attractions

Each Tokyo hop-on hop-off bus route boasts a unique set of stops‚ highlighting key attractions. The Red Route often features Tokyo Skytree‚ offering panoramic city views‚ and Asakusa’s Senso-ji Temple‚ Tokyo’s oldest temple. Ueno Park‚ with its museums and zoo‚ and Akihabara‚ the electric town‚ are also common stops.

The Blue Route may include Tokyo Tower‚ a symbol of the city‚ and the vibrant Ginza district‚ renowned for its upscale shopping and dining. The outer market of Tsukiji is another stop to savor some local tastes.

The Green Route typically covers Shinjuku Gyoen National Garden offering a serene escape. The Sky Hop Bus route includes stops in Shinjuku and Shibuya with their iconic scramble crossing and trendy shops. Consult the Tokyo hop-on hop-off bus map PDF for precise stop locations and nearby attractions‚ facilitating seamless exploration and efficient sightseeing.

Tokyo Hop-On Hop-Off Bus: Timetables and Frequency

Planning your Tokyo hop-on hop-off adventure requires understanding the bus timetables and frequency. Typically‚ the buses operate from 9:00 AM to 6:00 PM daily‚ allowing for a full day of exploration. The Red Route‚ known for its popularity‚ generally offers the most frequent service‚ with buses arriving approximately every hour.

The Blue and Green routes may have slightly less frequent schedules. It’s essential to consult the official timetable‚ often available in PDF format‚ to accurately plan your journey. The Sky Hop Bus also operates on a specific schedule. Factors such as traffic conditions can impact the bus arrival times‚ so it’s wise to factor in potential delays. Check the Tokyo hop-on hop-off bus map PDF for real-time tracking (if available) and the most up-to-date schedule information.

Purchasing Tickets: Options and Pricing

Securing your tickets for the Tokyo hop-on hop-off bus is a straightforward process with several convenient options. You can purchase tickets online in advance‚ often at a discounted rate. This allows you to skip the ticket queue and board the bus directly. Alternatively‚ tickets are also available for purchase at designated booths near major bus stops or directly from the bus driver‚ but advance purchase is recommended to save time and guarantee availability.

Pricing varies depending on the duration of the pass‚ with options for 24-hour or 48-hour tickets. A 1-day and 2-day pass are popular choices‚ with the cost reflecting the extended access. Some providers also offer family packages or discounted rates for children. Be sure to check the terms and conditions regarding validity and usage. Keep your ticket or QR code readily accessible for scanning upon boarding. The Tokyo hop-on hop-off bus map PDF might include special promotional codes or discounts; always check.

Sky Hop Bus: An Overview

The Sky Hop Bus offers a unique sightseeing experience in Tokyo‚ utilizing double-decker‚ open-top buses to provide panoramic city views. Introduced in April 2021‚ this bus service focuses on popular tourist areas like Shinjuku and Shibuya. The Sky Hop Bus operates on three distinct routes‚ ensuring comprehensive coverage of Tokyo’s key attractions. Passengers can freely hop on and off at designated stops‚ exploring landmarks at their own pace.

A key feature of the Sky Hop Bus is its provision of multilingual audio guides‚ offering informative commentary in multiple languages. This allows visitors to learn about the city’s history and culture during their journey. The Sky Hop Bus is a practical and economical solution for discovering Tokyo. The Sky Hop Bus offers 12-hour or 24-hour passes. The Tokyo hop-on hop-off bus map PDF displays the route and bus stops.

Audio Guides and Language Support

Enhance your Tokyo hop-on hop-off bus experience with comprehensive audio guides and extensive language support. These audio guides provide insightful commentary about Tokyo’s landmarks‚ history‚ and culture. Available in multiple languages‚ the audio commentary ensures accessibility for a diverse range of international visitors. Language support extends beyond audio guides‚ with readily available information and assistance in various languages.

Enjoy the convenience of exploring Tokyo with the aid of multilingual resources. The audio guides transform your sightseeing tour into an educational and engaging experience. Language support is crucial for international visitors to navigate the city effectively. The audio guides ensure everyone can easily follow along and appreciate the rich cultural tapestry of Tokyo. The Tokyo hop-on hop-off bus map PDF is also available and very helpful. The bus also offers free earphones and WiFi on board.

Tips for Maximizing Your Hop-On Hop-Off Experience

To make the most of your Tokyo hop-on hop-off bus adventure‚ careful planning is key. Start early in the day to take full advantage of the bus operating hours. Review the route map PDF beforehand to identify your must-see attractions and plan your stops accordingly. Consider traffic conditions‚ especially during peak hours‚ and adjust your itinerary as needed.

Utilize the audio guides to learn about the sites you visit‚ enriching your experience with historical context and cultural insights. Wear comfortable shoes‚ as you’ll be doing a lot of walking. Stay hydrated and carry snacks to keep your energy levels up. Don’t be afraid to hop off the beaten path and explore hidden gems. Check the bus frequency and plan your stops accordingly to avoid long waits. Finally‚ be prepared for varying weather conditions and dress appropriately. With these tips‚ your Tokyo hop-on hop-off bus experience will be both enjoyable and efficient.

Is the Tokyo Hop-On Hop-Off Bus Worth It? A Review

The Tokyo Hop-On Hop-Off bus offers a convenient way to see many of Tokyo’s highlights‚ but is it worth the cost? For first-time visitors wanting a general overview‚ it can be a great option. The buses cover a wide range of famous landmarks and hidden gems. The flexibility to hop on and off at your leisure is a major plus. However‚ the value depends on how much you utilize the service.

If you plan to visit many attractions along the routes‚ it can be cost-effective. Consider factors like traffic‚ which can slow down the bus and reduce the number of sites you can see. The audio guide provides informative commentary. For those who prefer a structured tour‚ the hop-on hop-off bus is a good choice. Ultimately‚ the decision depends on your budget‚ travel style‚ and how much you prioritize convenience over other transportation options.

Downloading and Using the Tokyo Hop-On Hop-Off Bus Map PDF

Maximize your Tokyo hop-on hop-off bus experience by downloading the bus map PDF. This essential tool provides a visual guide to all routes‚ stops‚ and key attractions. Easily locate the nearest bus stop. The PDF format allows you to access the map offline. Before your trip‚ download the PDF to your smartphone or tablet for convenient access.

Use the map to plan your itinerary. Identify the attractions you want to visit and the corresponding bus stops. Familiarize yourself with the different routes. Note the bus frequency to minimize wait times. The PDF map often includes helpful information like ticket redemption points. With the map at your fingertips‚ navigate Tokyo efficiently. The PDF map will ensure a smooth and enjoyable sightseeing adventure. Make the most of the flexibility that this bus service provides.